
The Second Battle of Trenton, 1776
21st December 2017, 4 Comments
The American War of Independence, Black Powder, 28mm
This is becoming something of a Christian tradition. A few years ago, “German Michael” laid on a refight of the Battle of Trenton, fought in the snow at this time of year. He sort of extended the game too, so that by its end the remains of the Hessian garrison had retreated a mile or so to the north. So, for the penultimate club night game of the year he picked up the game more or less where we left off in 2014. This time though, the Hessians had been reinforced by Cornwallis and a British brigade, with another marching to the sound of the guns. The Americans were in Trenton, with more troops moving up on the far side of Assumption Creek. So, for the second time in two years, battle was joined outside Trenton! The game was fought on an 8×6 foot table, covered with a white sheet. The town of Trenton sat at one side of the table (the southern end), while to the north was a low wooded hill where the Hessians and British were formed up. The creek ran lengthwise across the table, close to one table edge – the eastern one. That was pretty much it, apart from another low hill and a few scattered copses of trees.
 Michael and Bart played the part of the British, while Bill, Peter and I played the American rebels. That’s Bill and Bart, in the photo up above. Dougie was there too, pretending to be George Washington, but apart from offering questionable advice he didn’t actually do very much. There were more American than British players because they had more troops. Effectively, everyone had a brigade to play with.
  The battle began with the Hessians moving off the hill and forming up in the open ground between the hill and the creek. The British formed up on their right, in front of the hill, and facing south. because my militia were already on the far bank of the creek this British line was dog-legged, as Michael had to refuse his left flank. This was to be a key point a little later in the game.
 Over on the American left, Bill and Peter began a fairly cautious advance, but true to form Bart didn’t wait around for them. Instead he sent his British forward, led by a unit of grenadiers. Their target was the American line on the low hill in front of them, halfway to the town. Bill halted his brigade and opened up on the advancing British, but wasn’t able to stop Bart through firepower. Surprisingly though, when the grenadiers charged home the American regulars facing them not only stood and fought, but actually drove them back. This forced a morale check on the grenadiers, Bart rolled very low, and they broke and ran. So, first blood to the rebels.
 In the centre Peter’s riflemen began picking away at the enemy, but while moving up his lead unit rolled a double six, which meant a “blunder”. Accordingly, his unit had to charge the nearest enemy – a unit of Hessian grenadiers. They actually caught them in the flank, but then rather amazingly the Hessians didn’t lose a casualty, the Americans did, forcing them to bounce back and take a morale test. they duly failed, and the unit broke. So much for the steamroller in the centre. At that point the game looked like it could turn out to be a stalemate.
 Things though, were happening over on my side of the table. My small militia brigade had got into a firefight with the Hessians on the far side of Assumption Creek, and while the Germans might have been better troops, mine were backed up with artillery. Each turn the two Hessian units in the front line were disordered, meaning they couldn’t move, and shot back at a disadvantage. This did two things. First, it held up a third of the remaining British force while the main American force was massing on their flank. Secondly, it let me move up my own reserve – a small unit of Continental Dragoons.
  While the enemy were pinned the dragoons crossed the creek, formed up, then charged. They hit the right-hand Hessian battalion in the flank, and duly rode it down. Well, actually they inflicted a lot of hits on it, and Michael’s morale dice did the rest. By any standards this was a pretty impressive charge, but it wasn’t over yet. I had an exploitation move, and promptly charged the next Hessian unit – the one straight ahead of me. Like their fellows these guys were also hit in the flank, but the result wasn’t quite so spectacular. Instead of routing, they retreated off the table to the north.
  That effectively won the battle for us. Thanks to the 1st Continental Dragoons, the Hessian brigade had lost two of its three battalions, leaving it with just one fusilier battalion, a light gun and some jaegers. Meanwhile Peter’s brigade was coming on from the flank, aiming for the remaining Hessian battalion. Thanks to that bend in the British line, the Hessian brigade had been vulnerable to a flank attack. Now their flanks were hanging on air. So, with Michael all but out of the game, and Bart’s brigade down to two battalions, things were coming unstuck for the British.
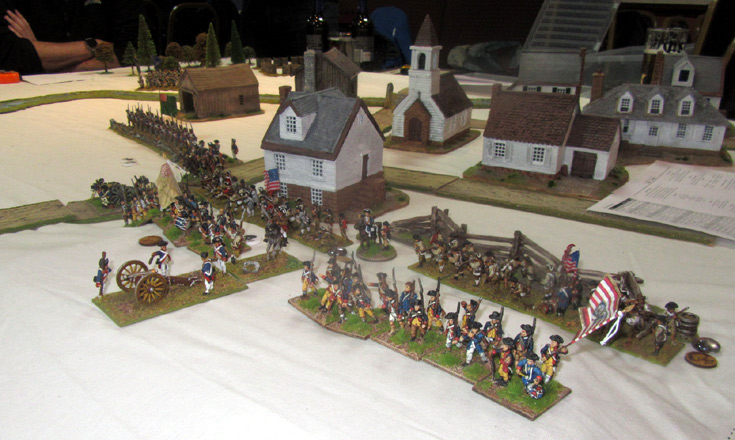
  This pretty much shows the situation. On the east side of the creek the now reinforced American militia was preparing for a general advance. To the north and centre, Bill and Peter were still not really doing much, but they were starting to edge forward, and they had overwhelming weight of numbers going for them. The third Brigade – British reinforcements – was still marching to the sound of the guns, and by now they’d be too late to save the day.
  So, General Cornwallis – or Bart – decided to call it a day. He sensibly withdrew his remaining troops, using his reinforcements as his rearguard. No doubt he’d be back, but for now Washington’s troops were happy to celebrate their convincing Christmas victory. Incidentally, while we use Black Powder, we’ve sort of tinkered with it. Both Bill and Michael have their own AWI amendments to it, and we used Michael’s version for this game. Both though, have reversed the turn sequence – so we fire before we move. We generally find that works better. All in all though, it worked well, and produced a fast-paced and enjoyable game – or at least it did for us rebels!
Thoroughly enjoyable thrashing of the British. Will await the next refight.
An other excellent photo report and AAR, thanks for sharing.
I hope you all had a good Christmas and I wish you all a merry New Year.
Happy gaming,
Will
When our local group plays Black Powder (not my favorite rules but hey they give a complete game in one evening), we also have switched to firing first before moving. It’s a big improvement.
Use you had both the bridgett the south end of town and the hill beyond it. Did they give your brits as hard a time as they did Cornwallis?