
The First Battle of Saratoga, 1777
17th February 2015, 0 Comments
The American War of Independence, Black Powder, 28mm
This game was taken directly from the scenario at the back of Black Powder, and used my full 12×6 table. The First Battle of Saratoga (or Freeman’s Farm) is something of a wargaming classic. It involves a British assault across a stream – a tributary of Mill Creek, as they try to force their way through the American positions beyond it, in the vicinity of Freeman’s Farm. In this game both sides have three brigades apiece, so it is a fairly small and manageable game – and one that is often well balanced. That day the fate of a continent rested on what a few thousand troops did in that remote corner of upstate New York. Unfortunately on the day the bad guys won, and the scheme to split the rebel colonies in two fell apart. This time though, the result might well be different. I’ve refought this battle a few times – it was interesting to see how it would play out this time around. In the map below, South is at the top.  According to the Black Powder scenario – a simplified order of battle to the real thing – the Americans began the game with just one brigade on the table. This was a small force of light infantry and riflemen commanded by Colonel Morgan. Two other columns, led by Brigadier Generals Poor and Learned began marching onto the table on turn two. The leading British brigades – Brigadier Hamilton on the left, and Brigadier Fraser on the right were both charged with crossing one of the two fords across the stream, and piling into the American positions. When the game began Hamilton’s advanced guard of light infantry was already across the stream, and deployed in a skirmish line next to Freeman’s Farm. A third small brigade of Hessians was following Fraser’s command onto the table. This dictated that the main push would be on the British right. Gyles and Sean played the British, while Alan and his son Robert took command of the American rebels. I acted as General Johnny Burgoyne, and also commanded the reserve – Lt. Colonel Breymann’s small brigade of Hessians.
 The British advance didn’t get off to a good start when Hamilton (played by Sean) failed his command dice. So, his line didn’t move forward to the stream – it just sat there, aside the lateral road on the British side of the table. Amazingly he kept failing his rolls (he needed 8 or less on a 2 D6) for another ten turns. Towards the end I lent him Burgoyne, hoping to boost them into action, but twice Sean failed on the CinC’s rolls too! Amazing. Anyway, the only unit he could do anything (with was his line of piquets on the far (south) side of the stream. They could move under their own initiative, due to their proximity to the enemy. They quickly got into a firefight with Morgan’s riflemen, but they held their own. However, when Poor’s brigade began marching on from the southern table edge they retreated back into Freeman’s Farm, where they holed up for the rest of the game. This actually worked quite well. The whole of Poor’s column strode past in march column, and proved easy targets for the British. Over the next few turns no fewer than two of Poor’s units – the 2nd and 3rd New Hampshire Continentals – both had to take a break test, and both failed spectacularly. First blood then went to the British.
 Over on the British right Fraser’s brigade (led by Gyles) was making slow progress towards the second ford, leading to Coulter’s Farm on the south side of the stream. A combination of the leading units of Learned’s brigade – the 2nd and 8th Massachusetts – stopped any move forward through firepower, supported by Dearborn’s light infantry skulking in a small wood on the east side of the ford. Fortunately von Breymann’s Hessians had been making good speed up the road leading on from the north-west corner of the table, and on reaching the ford they deployed into attack formation – two battalions of Hessians, with a unit of jaegers to take on Dearborn’s men. On the first attempt the leading unit of grenadiers was halted in disorder as it splashed across the stream, thanks to telling fire from the 2nd Massachusetts. However, the supporting unit – a Hessian light infantry battalion – passed through the grenadiers, and on the following turn it was the British who won the initiative. They charged in, the closing fire from the rebels was considerably less than telling, and in the melee that ensued the Massachusetts rebels were broken.
 Further over to the British right Gyles’ light units – a mixture of Indians, Loyalists and British lights – skirmished with the 8th and 9th Massachusetts on the far side of the stream, and managed to break one of the battalions – the 9th. Things were looking up for the good guys! They were just about to get better. Spurred on by this, Gyles sent the British Grenadiers forward, who splashed across the stream and into the 8th Massachusetts. The rebels broke and ran, as did Dearborn’s lights in the wood on the other side of the ford, thanks to fire from the German jaegers and British artillery. This left poor Alan (Learned) with only one unit – the 1st Canadian. We’d already decided to abandon the brigade morale rule, so he had something to play with, so he holed them up in Coulter’s farmhouse, as the British and Hessians streamed across the ford.
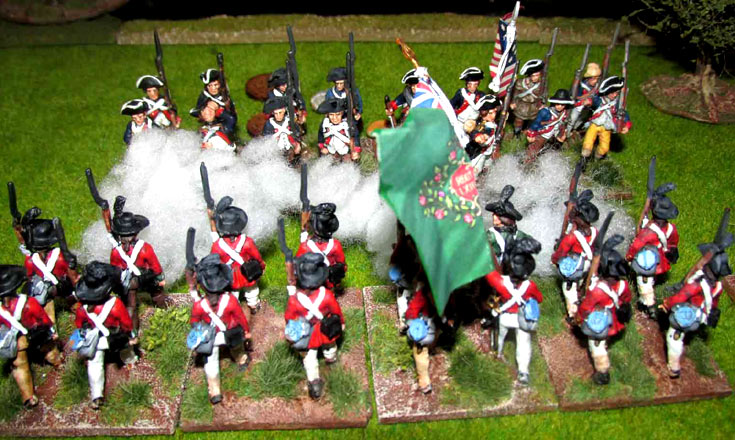
 Back around the ford by Freeman’s Farm Hamilton’s brigade had finally rolled forward, and was now approaching the north bank of the stream. Father and son – Alan and Robert – had a brief conference, and then Robert (Poor) announced he was advancing. This was heady stuff. Could he defeat the slow-moving British through a spirited charge, before Fraser and von Breymann’s troops could intervene? Well, Richard had five regiments left, one of which – a militia unit – was used to screen the farmhouse. He charged across the stream with two units in line – the 2nd and 4th New York, while the 1st New Hampshire traded shots across the ford with the British 9th Foot. A unit of militia acted as supports. This should have been a slaughter – apart from the screened 9th Foot Sean (Hamilton) had three battalions in line, supported by a gun, while a second gun from Fraser’s command was a little in front of the far right side of the line, and was promptly turned to fire into the American flank.
 Amazingly the charge went in. One unit – the 2nd New York – survived closing fire but was forced to retire after taking too many casualties in the melee. The following turn it broke, having taken more casualties from the outflanking gun. The 4th New York was still in the fight though, and fought two rounds of melee before it too was forced to retire. So, the British line held, and what remained of Poor’s brigade pulled back to lick its wounds. That was also the end of the game. While it had ended in a clear-cut British victory – as is only right and proper – it was a hard-fought and thoroughly enjoyable little game. As usual Black Powder worked well, and produced a fast paced and highly entertaining game.