
The Defence of Imishli, 1919
31st January 2019, 2 Comments
The Back of Beyond, Setting the East Ablaze, 28mm
First of all, let me apologise for taking almost four weeks to post this. I had a fire in the flat, and it’s taken me that long to start getting back on track. I was pretty busy. Then I hit technical problems, such as where in the storage unit was the camera, or its charger, or even the copy of Adobe Photoshop that mysteriously vanished from my computer? Well, the good news is we’re back on track – sort of. Now I just have to clean the smoke stains off thousands of figures. Anyway, on to the game. This was a Back of Beyond bash, set in Azerbaijan. The Reds had advanced and cut the Baku to Yerevan railway, which the local nationalist Azerbaijanis wanted back. Fortunately a powerful Turkish occupying force needed the railway too – its lifeline back home, so the stage was set for a Turkish “push” to capture it.  The game was fought on an 8×6 foot table, with the railway crossing it roughly in the middle, running between the two long sides. It ran roughly east to west. A road ran between the two short edges (north and south), while to the north of the railway was a dried-up gully – the line of an oil pipeline. The only other terrain of note was the odd low hill or wood, and a railway halt, somewhere to the west of the town of Imishli. Alisdair and I played the Bolsheviks, while Peter and Bart commanded the Turks. All the lead came from Peter’s collection.
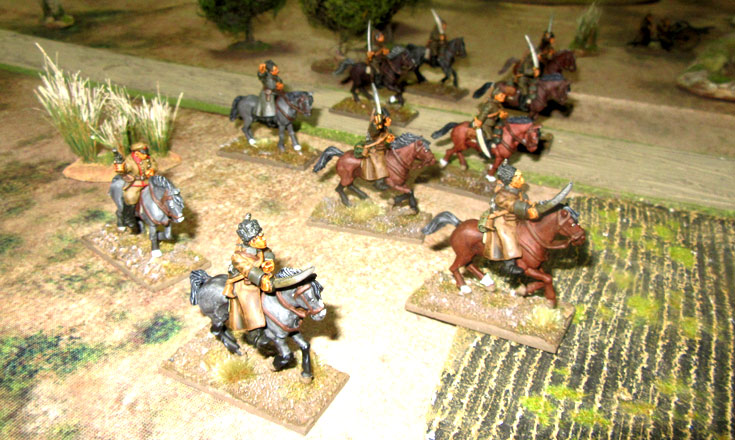
  The Bolsheviks (or Reds) had four ten-man rifle units lining the line of the gully, backed up by a leader and a machine gun. Everything else was going to come on as reinforcements, from the southern edge of the table. The Turks came on at the start from the northern table edge, and began advancing towards the gully with everything they had – eight 10-man infantry units, a large 16-man cavalry unit, plus a couple of field guns, a couple of machine guns and an armoured car. It was a pretty formidable force, but our orders were clear – to hold the line of the railway until reinforcements arrived to save the day!
 The Turks started with a general advance, supported by their field guns and Maxims. Seeing the lack of powerful weaponry the Turkish armoured car roared forward to seize the bridge over the gully, as it was impervious to our rifle bullets. I scored a few hits on the turkish infantry though, and chewed up a couple of units before my own losses began mounting. Gradually though, the Turks crept closer to the gully, and my defenders began to be whittled down. A spirited charge by a Turkish infantry unit across the gully broke one of my depleted units, and with it my defensive line.
  So, when my machine gun was knocked out I pulled back my surviving units to the line of the railway. This was just as good a defensive position as the gully, and it also had the advantage of being closer to my reinforcements, who were starting to come onto the table. One of the first was my own armoured car, which raced forward to the station, ready to do battle with its Turkish counterpart. Any hopes of a gallant duel though were clashed when it was immediately wiped out by a Turkish field gun.
  On my left (towards the western edge of the table) my line was holding strong, but the Turks began crossing the gully to the east, while their cavalry occupied a small wood. This then was where my reinforcements headed – first a couple of my own field guns, followed by some infantry and cavalry. meanwhile the Turkish armoured car had crossed the railway line, and was shooting up the defenders of the station.
  Over on the Turkish left the infantry were across the gully, and forming up for an attack up the road. Those Red field guns kept them at bay though, and bought time for my cavalry to gather behind the railway station. By this time my defenders were in a bad way, getting shelled, machine gunned and riddled with rifle bullets. they retired, but by then I had a spare infantry unit, which massed behind the building, ready to occupy it if the Turks tried to storm forward.
  Then I had a bit of luck. The Turkish armoured car was keeping the station between it and my field guns, so I couldn’t shell it. So, I did the next best thing. A unit of Red cavalry charged forward, lapping round either side of the station, and rode down the Turkish infantry advancing to storm it. They couldn’t melee the armoured car, but this allowed my infantry to threaten it, forcing it to back off.
  So, with the station reasonably secure I was able to move the rest of my troops forward, supported by those Red field guns. The Turks had their own cavalry though, lurking beside that wood near the eastern side of the table. I had to screen them, but they seemed reluctant to charge without support, so I left them to it. Instead my cavalry charged some Turkish infantry near the main road, and wiped them out. This cost me a cavalry unit though, but thanks to a lucky shot from my supporting tschanka (cart-mounted machine gun) the Turkish cavalry were pinned, and remained where they were.
  By now we were running out of time. The Turkish advance had stalled all along the line, and although they’d crossed the railway line on the eastern side of the table, that was their only real success. The Turkish guns kept pounding the station though, and my cavalry, but it was pretty clear their advance had stopped.
  So, in the end we called an end to the game. It was arguably a Bolshevik victory, as the only Turkish unit blocking the railway line was the armoured car. Everyone else – from the cavalry in the east to the infantry in the west – were on the northern side of it, and pinned down. However, in the spirit of fairness we hailed the achievement of that plusky armoured car, and the game was declared a draw. Like all Back of Beyond fights is was a great little game, and everyone had a great time playing it. It was also nice playing one without having any of my own lead on the table for a change – and so I didn’t have to cart it all home at the end of the night!
Great looking game, gentlemen! I always enjoy your Back of Beyond games. And unlike a lot of WW1ish era games, cavalry actually have a role to play. Maybe that’s because our local group does a lot of 1914 Western front games and our cavalry invariably get blasted.
At least you can clean the smoke off your figs, that must be a relief! So guess it could have been worse.
It could have been, Joe. The figures could have melted. Instead they survived, smoked like a salmon but otherwise unharmed. The plastic “2really USeful” storage boxes though, are still covered in soot, and a couple actually started melting.It’ll take me a while to sort that lot out…