
The Bridge at Perro Negro, 1810
19th March 2014, 0 Comments
The Napoleonic Wars, Black Powder, 28mm
This little Napoleonic game was based on a scenario on Scenarios for All Ages, by Charles S. Grant and Stuart Asquith. The idea is, both sides want to capture the same bridge, and two matched forces are sent to secure it. A second supporting column is ordered to help, so you have four columns of troops entering the table from four different table edges. We used a 7 x 5 foot table. Charles writes a darned good scenario, so I knew this would make for an interesting game. The river is fordable anywhere except within a foot of the bridge. We diced for arrivals, and the British were to come on at A, the French at D, and the British and French reinforcements at B and C respectively. While both main columns entered on Turn 1, the reinforcements had to be diced for each turn – a 5 or 6 needed to bring them into play. We took a few liberties with the terrain and the forces, to suit what I had to hand, but essentially everything was based on the set-up in the scenario book. I umpired until the British reinforcements came on, when I would switch to take charge of that column. Otherwise Joe took the British, and Mark the French. Both sides were told that each column had to include a three battalion brigade. Where the two guns and the two regiment cavalry brigade came on was entirely up to the players. Mark opted to lead off with his cavalry brigade at D, and began by launching his chasseurs in a madcap charge over the bridge. The British had only just come on, and the French horsemen smashed into a pair of limbered guns. We actually introduced a house rule – officially in Black Powder you can’t charge in march column. In this case we allowed it on greatly reduced melee dice, to let people fight their way across the bridge. The result was a disaster for the British. Honours was restored the following turn though, when the chasseurs charged a Portuguese battalion, and were halted by musket fire. They then failed their break test when the French player rolled a double one.
 Then it was the turn of the dragoons. They also charged over the bridge, only to hit a British battalion in line. They didn’t even form square, but tried to rely on musket fire to halt the charge. This was touch and go – both sides suffered “hits”, but the lack of supports for the French led to them retiring back over the bridge. They spent the rest of the game milling around on the north side of the bridge, getting shot at by the British battalion, who by then had taken up position in the church (an inn on the original map). By then though, the game was already well underway. The French infantry had moved off the road and forded the river to the west of the bridge. Similarly the French reinforcements began coming on at C during Turn 3, and then crossed to the south bank behind the building marked chateau on the map.That meant the French had formed two pincers, each with three battalions supported by a gun, and they were converging on the road at A.
 All this time the British player was frantically rolling for his own much-needed reinforcements – three more battalions of infantry, and two regiments of cavalry. They never arrived. A succession of bad rolls – eight in a row – meant that one solitary Anglo-Portuguese brigade – stripped of its guns – was outnumbered by more than two to one. The French right hand column took a big risk. After all, if all those British reinforcements had appeared they’d have come on at B, and smashed into the flank of the French column. Instead they marched on without interference.
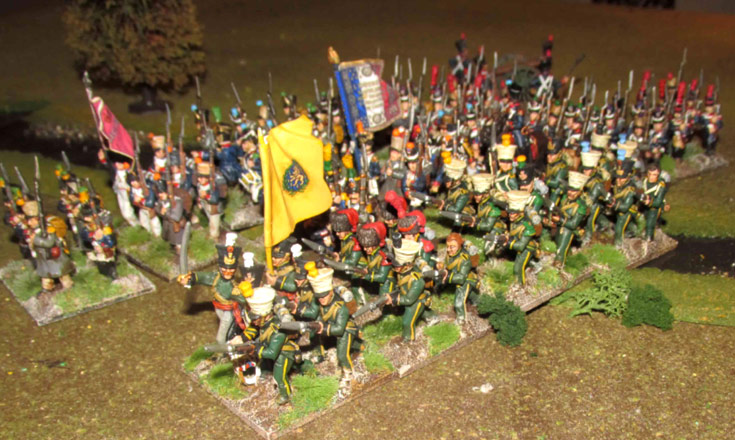
 Over on the French left the other three battalions formed a large block of columns, and all that stood in their way was a line of riflemen and a single battalion of Portuguese line. The riflemen were in skirmish order and evaded, while the French columns outstripped their own skirmishers and piled into the hapless Portuguese. Despite some valiant defending the Portuguese were forced to take a break test, and rolled badly – almost as badly as the French chasseurs-a-cheval. They were taken off the table, which meant only two British infantry battalions lay between the two jaws of the French pincer. At that point we called the game to a close. The British might have tried to escape, but by then it was pretty clear the bridge was going to be safely in French hands – and that – after all – was what the scenario was all about.
 We used Black Powder for the game, which has its own quirks and charms, but allows for a quick game. Our original plan was to use General de Brigade, but the French player forgot our one set – hence the use of Black Powder. Still, the quick victory meant we had time on our hands, and so we used the time shooting the breeze about matters wargaming instead of actually playing anything more! It would be interesting to play out the scenario with GdeB next time, to see how it works. Still, with the British player’s die rolling for reinforcements it probably would have ended the same way – an emphatic French win.