
The Battle of Weissenfels, 1759
3rd June 2015, 0 Comments
The Seven Years War, Black Powder, 28mm
In Battlegames magazine’s special – Tabletop Teasers Vol. 1 (published in 2008), Charles S. Grant published a teaser called “Seizing the “Pass” – a scenario which had previously been published in Charles’ regular Teaser column in the magazine. In it, the pass consisted of a valley with a river running through it – a valley surrounded by mountains, apart from a pass at either end. Two small armies arrived in the valley at the same time, and were set on seizing it from the enemy, and thereby gaining control of the whole pass. Charles dubbed this scenario “The Battle of Soggy Bottom”, as a French ADC repeatedly rode back and fore across the river with messages – getting a wet backside in the process. Charles’ original teaser was set during the Austerlitz campaign of 1805, and fought between French and Austrian forces. We kept the same protagonists (but switched their entry points around), but moved the game back to 1759, and a fictitious clash between the forces of France and Austria. We also changed the forces slightly, giving both players less cavalry, as the Austrian players didn’t have much in the way of horseflesh. In fact, a regiment of grey-coated French cavalry had to masquerade as Austrians for this battle. Both sides had two brigades of infantry (each of four battalions), a battery of two guns, and a brigade of two cavalry regiments – one line cavalry, the others hussars. Dave Imrie and Tim Watson commanded the Austrians (from Dave’s collection), while Michael Schneider and I took charge of my French and Reichsarmee figures. The photo below shows the original set-up, with both sides appearing on opposite diagonal corners of the 8×6 foot table. Actually, my photograph missed most of the Austrians, apart from their cavalry vanguard. That’s the French in the top right.
 Apart from the river (which had a bridge and three fords across it), the table was dominated by several small hills (which you don’t see from this aerial view, as they were underneath the base cloth), a couple of woods and a farm. For ease of play we ruled that the buildings clustered around the bend in the river had no impact on the game. Both sides had the same objective – clearing the valley of the enemy – but they set about it in different ways. The Austrians ordered one infantry brigade to cross the river, and to threaten the French flank from the far bank. The cavalry would race ahead and occupy the high ground between the farmhouse and the bend in the river, while the second infantry brigade would plod forward behind them. The guns were divided up between the two infantry brigades. By contrast the French decided to send half a brigade (the two battalions of the Regiment Conde) to cover the only ford north of the bend in the river, while everyone else – the other six battalions plus the guns – would move to the same high ground the Austrian cavalry were heading for. For their part the French cavalry would screen this advance, before taking up position on the French right flank.
 The Austrians had mixed fortunes with their approach march. Their cavalry brigade cantered forward, and seized the high ground ahead of the French. However, the brigade crossing the river failed about four command rolls, one after the other, so the troops stayed where they were – halfway across a ford. they then rolled a “”double six”, which was a blunder, which led to them marching off the table edge. After that though, they sorted themselves out, and on returning to the table edge they began a slow but steady advance towards the far bend of the river – where the men of the Conde regiment were waiting for them on the far side of the ford. Back on the south side of the river the Austrian cavalry and the French cavalry charged and counter-charged each other, and an almighty cavalry battle ensued. The two line regiment and the two hussar regiments faced each other. Finally, after all that marching, battle was about to be joined!
 The cavalry were fairly evenly matched – the hussars fighting their counterparts, and the line cavalry theirs. the only difference was that Tim’s Austrian cavalry were of slightly better quality than my French horsemen. We fought the line cavalry clash first – my Maestre de Camp regiment taking on the Austrian Serbelloni Cuirassiers. The Austrians won, and my guys were forced to retire. The Austrians followed up with an exploitation charge, but this time – amazingly – the Frenchmen held their ground, and forced the Austrian horse to pull back. Then came the clash between the French Bercheny Hussars and the Austrian Esterhazy hussars. Strangely, both regiments wore similar uniforms – only the Frenchmen looked more chic. Once again the Frenchmen retired, but this time the Austrian horsemen charged a new target – the French guns. As this was an exploitation charge the gunners had no time to react, and after a token struggle they were ridden down. That though, proved to be the high water mark of Austrian fortunes.
 The Serbellioni Cuirassiers were shot at and failed a break test, which meant they were removed from play. Then the Esterhazy hussars were shot at from the front, and from both flanks. they were disordered, and milled around like this for another turn, before they were finally broken by flanking fire from the Elector Archbishop of Köln’s troops. Having recovered from their earlier setbacks and dealt with the Austrian cavalry, the French cavalry brigade rode away to the flank as ordered – between the farmhouse and the southern table edge – and set about rallying off its many “hit” markers. With the loss of Tim’s Austrian cavalry, and the ponderous advance of his flank march, that meant Dave’s Austrian infantry brigade, supported by a small unit of Grenzers and a gun – faced the bulk of the French army.
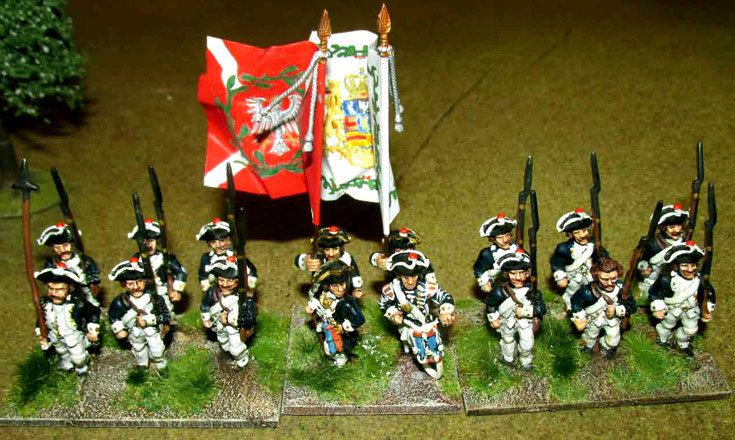
 Actually, Dave had sent a battalion of IR 16 (Konigsegg) forward, to try to support the Austrian hussars. Instead they faced six battalions of French and Reichsarmee infantry rolling towards them. Their fire disordered two battalions of the Regiment de Touraine, but they became disordered themselves, by flanking fire of the Nassau-Weilburg regiment (that’s them above). In the melee that followed the Austrian foot were defeated by the freshly-rallied Touraine regiment, and Dave failed yet another break test. This melee had lasted for two turns, and in the second round Dave brought up a battalion of the IR 20 (Alt Colloredo) to support their left flank. They had to test for supporting a broken unit – and of course Dave rolled “double 1”. that meant the Austrians had now lost two cavalry and two infantry regiments. The French were on a roll!
 Seizing the initiative the Köln Wildenstein Regiment charged the Austrian gun battery, and captured it, after suffering minimal casualties. Finally the second battalion of IR 16 (Konigsegg) was drawn into a firefight with the Reichsarmee troops, and was put to flight by the all-conquering Nassauers. That left Dave’s brigade with just one battalion of infantry, and a unit of Grenzer skirmishers, who were lurking in the wood on the Austrian left flank. What would have come in handy here was the support of the second Austrian brigade, but they were still in the final throes of approaching the Conde regiment, waiting for them across the ford in the river. Even if this little battle had begun, the Austrians would have been hard-pressed to drive the Frenchmen from the ford. So, with time running out we decided to halt the battle, and the Austrians conceded defeat. It was a thoroughly enjoyable game – and not just because we won – and proof – if it were ever needed – that Charles S. Grant can invent a pretty good tabletop teaser when he puts his mind to it. The game was finely balanced, and the deployment choices made by both sides had a real impact on the outcome of the battle. Its been a while since the Seven Years War armies have had an outing, but Dave and I promised each other to have another battle within a few weeks – once he’s had a chance to paint up some more troops.