
The Battle of the Samara, 57BC
27th July 2017, 0 Comments
The Roman World, To the Strongest, 28mm
Due to popular request we returned to Gaul this week, for another grudge map between Caesar’s Romans and the locals. While our last one was set down in modern Switzerland, this one was in northern France, or rather Gaul, near the Gallic oppidum of Somarobriva (Amiens).We fought this one on an 8×6 foot table, its surface divided into 8″ (20cm) squares. essentially the battlefield was an open plain, with a camp at each table edge, and trees and hills around the fringes. However, down one side ran a big river, the Samara (Somme). In To the Strongest terms both sides had 155 points to play with, which meant this was a medium-sized game. Both sides grouped their forces into three commands – two of infantry and one of cavalry. The infantry ones had a core of four main units, either 36-figure warbands for the Gauls or 18-strong cohorts for the Romans. Most had an additional small unit of skirmishers attached, whose primary job was to guard the camp at the back of the army. The cavalry commands had three or four units of Gallic cavalry each – the Gallic one being stronger than the Roman one. So, the scene was set for our next big clash of the Gallic Wars.
 This was a multi-player affair, as quite a few of us wanted to finish getting our heads around the rules. So, Ken Peter and Michael played the Gauls, while Bart, Campbell and I commanded the Romans. So, we each had a command, with Bart and Ken taking control of the cavalry wing, on the Roman left. Naturally enough the battle began with both sides advancing – the Romans to form a line in front of their camp, and the Gauls to throw themselves at the Roman line before it could form. Still, it was the cavalry who were first into action. Both sides had Gallic cavalry, but with three units to four Rome’s Gallic Allies were slightly outnumbered. Could the Gallic horse led by Chief Timex make the most of his numbers?
 It seemed so. On Turn 3 Bart lost his first unit, having launched a rather rash charge against an Atrebatean warband. He fought well, but the Gallic infantry are in deep units, and absorb three hits before they break, while the cavalry rout after two hits. After that Bart was outnumbered even more, but although the writing was on the wall for his alter ego Publius Crassus, he kept the Gallic horsemen at bay for a few more crucial turns. Back in the infantry battle though, the two sides were finally coming into contact.
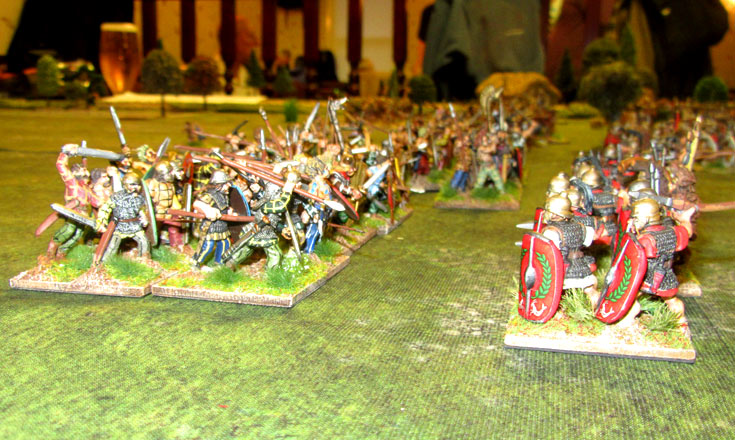
  At first things went pretty well for the Romans. The two Gallic commands seemed to have problems coordinating their attacks, and Campbell’s veteran X Legion had little trouble keeping Michael’s Nervii at arms length. the Atrebaters facing me didn’t get off to a great start, losing first one warband, and then another. Eventually though, things evolved into a big grinding match, as a string of less than perfect cards took the bite out of the Roman defence. Eventually, by the end of Turn 6, the Romans had lost one cohort, while the Gauls had lost three warbands. We could have broken the back of the Gauls then, were it not for the disaster on the left flank.
  You see, back on the cavalry wing things were starting to collapse. Bart lost the second of his two units, which just left one auxiliary cavalry ala, led by Publius Crasus. Ken’s Gallic horse now outnumbered them four to one, so the outcome wasn’t really in any doubt. Charged in the front and the flank simultaneously, Bart’s last unit was eviscerated, along with its commander. In terms of Victory medals this was something of a disaster. Each army had a number of these tokens – 12 for the Romans, and 14 for the Gauls. Two were surrendered for the loss of each Roman cohort and cavalry unit, or a leader, while the Gallic warbands were worth three tokens. that meant the loss of the three cavalry units and their commander, plus one of Campbell’s cohorts, meant we were down to our last two tokens.
  The Gauls weren’t too rosy either. They’d lost four warbands now, which meant 12 tokens. That meant the loss of one more unit on either side would empty the token pot, and decide the game. For the sake of simplicity we weren’t playing the command demoralisation rules. If we were, the Gallic infantry commands would have been in a poor way. Still, the Roman cavalry had gone, and while Ken swept forward towards the Roman camp – doughty held by a init of Balearic slingers – the infantry slog continued. We both had units on the ropes, but in the end the Gauls saved their crucial third hit on their weakest unit, while we failed the second one on ours. That meant the loss of another Roman cohort, and the declaration of a hard-won Gallic victory. it was a cracking game, with victory or defeat hanging in the balance until the very end. It ended with a couple of the participants vowing to raise their own armies,. So it looks like the minor Ancients craze generated by these excellent rules will continue for some time to come!