
The Battle of Red Clay Creek, 1777
24th May 2015, 0 Comments
The American War of Independence, Black Powder, 28mm
This weekend I took part in a large American War of Independence game – a fictitious battle set during the Pennsylvania Campaign of 1777, fought in the conservatory of a hotel in Fife. Eleven of us took part – five Australians, the rest Brits, using some lovely terrain supplied by Dave Imrie and Brian Phillips, and figures from the collection of Jack Glanville, Bill Gilchrist and myself. The Australians were from Brisbane or thereabouts, and were over on a wargaming holiday. After Scotland they go on to see Portsmouth, Normandy and Waterloo. Anyway, for this game about half of each side were Aussies, while the rest of us filled in the gaps. For once I was on the rebel side, commanding a veteran brigade of Maryland Continentals, where I faced off against a British brigade run by Dave Imrie. We were on the end of a long 12 foot by 6 foot table, where effectively players faced off against each other, to make up a larger battle. The Americans were on the defensive in this game, deployed in part behind the fictitious Red Clay Creek. We had three brigades off table acting as a reserve, but then again so did the British. Due to the table layout and the deployment, this would be a straightforward frontal attack, all along the line. If the British could punch a hole in our defence, then they’d deploy their reserves to pour through the gap and rip our army apart., Our job was simply to stop them.
 I’ve no idea how many figures were on the table, but with 8 British and 9 Rebel brigades, plus a couple of cavalry units, that would have come to around 800-1,000 figures a side, as a typical regiment/battalion sized unit had around 18-20 figures in it, with around four of them to each brigade. That’s a fairly small “big game” for us, but it still looked impressive enough, especially with the rather nice bespoke terrain tiles we were fighting over.
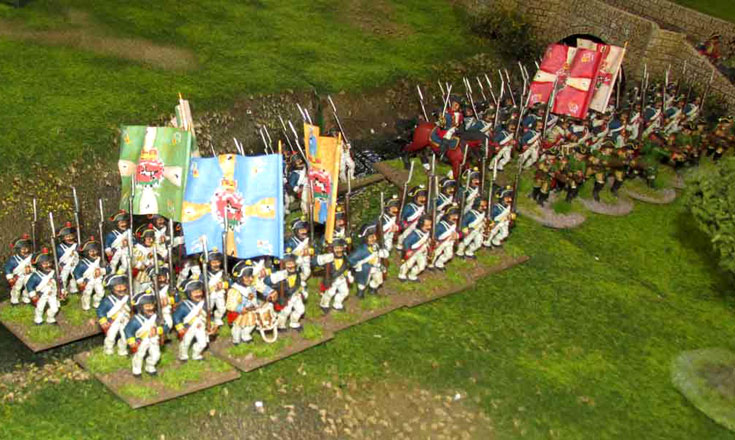
 The British attacked piecemeal, largely because the river got in the way of a coordinated assault. To the west of the creek the British did pretty well, punching a big hole in hr American line. On our side of the creek though the American militia took up position behind a fence-lined road, and held their ground in the face of repeated Hessian and British attacks. Dave Imrie and I fought our own private battle in the vicinity of the village in the foreground of the picture above. In fact the buildings were there for scenic purposes only, and this little private battle arena was devoid of terrain that would get in the way of our little firefight. Both sides hammered each other, but my Marylanders were more than holding their own by the time I had to leave at around 5pm. The battle continued though, as most of the others were staying in the hotel overnight.
 In fact, that made the game less dynamic than it might have been, because as soon as the bar opened the Aussies and most of the Scots started drinking. As the day wore on the time taken to complete turns seemed to get longer and longer, as the drinks started to flow! I was cursing the fact I had to drive back to Edinburgh, and was nursing Coke rather than lacing the stuff with rum. Anyway, the battle to the east of the creek was something of a non-game, as the Rebels found it fairly easy to keep the British and Hessians at bay. On the far bank though things panned out differently. At one point an impressive charge by Banastre Tarleton and the British Legion cavalry swept across the table, and saw off several Rebel units, until Continental Dragoons arrived to even the odds a bit. This was followed by a determined drive by the British and Brunswick infantry, who almost managed to cut the American army in two.
 However, more by luck than judgement the American militia in the threatened sector of the field managed to hold their ground, buying time for reinforcements to shore up the American line. Both sides lost a brigade of good quality infantry in the fight for the centre, but the commitment of the reserves by both sides led to something of a stalemate, as neither side had the strength to deliver a knockout blow. At one stage the battlefield was a sea of units fighting all over the place, as the two lines became interpenetrated, and the fighting came down to a succession of bayonet charges and bloody melees. Eventually though the two sides sorted themselves out, but by then it was clear that the Americans would stand firm, and therefore would win the day.
 After my late afternoon departure the game continued until dinner, and then resumed after, but effectively the battle had already been decided. With the American line holding, and the British unable to punch through it, victory was duly handed to the Rebels. Everyone had a great time though, and the game looked terrific, thanks to some nice figures and some first-class terrain. It was one of those games that was a pleasure to fight, partly because of the friendly atmosphere, but also because the table looked so darned good. I hope our new-found Aussie friends take home equally good memories of the day they spent wargaming in the conservatory of a Scottish hotel!
 Before anyone asks, the rules we used were Black Powder, modified by Bill Gilchrist. His amendments can be found on his own wargaming blog, which also contains a whole lot more pictures of this pretty-looking and enjoyable game.