
The Battle of Musselberg, 1809
3rd June 2017, 7 Comments
The Napoleonic Wars, General d’Armee, 28mm
In the afternoon of our Deep Fried Lard day this Saturday I got the chance to try out General d’Armee. I’ve been hearing a lot of good things about the rules, so I was keen to see how they played. Technically they’re not a Too Fat Lardies set of rules at all, but are published by Richard Clark’s new offshoot company – Reisswitz Press. They’re written by my friend Dave Brown, who wrote General de Brigade, which are still my favourite Napoleonic rules. In the Edinburgh club the guys prefer a simpler system, and so we tend to use either Over the Hills or Black Powder. These were billed as a faster and slicker version of GdeB, and so I had hopes it would serve as a halfway house, and so could be used to lure my fellow gamers into slightly more challenging Napoleonic games.  This game, with terrain, figures and eminently patient umpiring laid on by John Ewing was set in the 1809 campaign. It therefore matched a French force against an Austrian one. Each army was a division-sized outfit, with three brigades of infantry and one of cavalry. The aim was to capture a road running down the centre of the table which led to a bridge off the Austrian right flank,. Rather than make the bridge the focus it was all about controlling the road. In this game, Campbell and I controlled two Austrian brigade apiece – an infantry one, supported by the cavalry brigade for me, and an advanced guard for him. Our opponents in what turned out to be an all-Edinburgh club show were Bart and German Michael. Really, you go to an event which attracts wargamers from all over Central Scotland, and you land up playing your regular opponents!
  The game began with us moving our two Austrian infantry brigades forward to occupy the road. This seemed like a good idea at the time, but we sound found our limbered artillery batteries (one attached to each brigade) taking heavy fire from their French counterparts. On our right, Campbell sent his Advanced Guard forward to occupy a wood – just about the only terrain on the table apart from the bridge and the river. That secured our right flank. Unfortunately our left one was about to be ripped apart.
  On Turn 4 we were hit by a double whammy. In General d’Armee you get an ADC for each brigade you command. We had four brigades, so four ADCs. The sometimes don’t appear – if you roll a 1-2 on a D6 he’s unavailable that turn. Otherwise though, you can use them to help keep units in command, or to do spectacular things, like launch a fast advance, or fire your artillery with extra oomph. Their real worth comes in the command phase, when you roll for each of your brigades. Essentially, a 1-2 on a D6 again means they become “Hesitant”, and therefore can’t advance. My cavalry chose that moment to go “Hesitant”, as I failed the command roll. The ADC gives you a re-roll, but I rolled another “”2. That, of course, as when Bart launched his French hussar brigade in an all-out charge.
  My Austrian hussars did their best, but while one regiment held its ground, the other lost the melee, and was forced to retire. Bart followed up, and before I knew it first one Austrian regiment and then the other were routed from the field. To add insult to injury Bart then charged my now badly exposed gun battery, forcing the gunners to head for the hills as well. So, in the space of two turns my flank was ripped apart!
  Over on the centre and right, the clash between the French and Austrian skirmish screens was just a prelude to the main event. To coincide with his cavalry charge, Bart launched his infantry brigade into the attack, coming on in column against my Austrian line. I was pretty confident I could hold them – or rather I was until my cavalry brigade dissolved. Now I had to strip away my infantry supports in my second line to refuse my left flank. All in all things weren’t going too well for Team Austria…
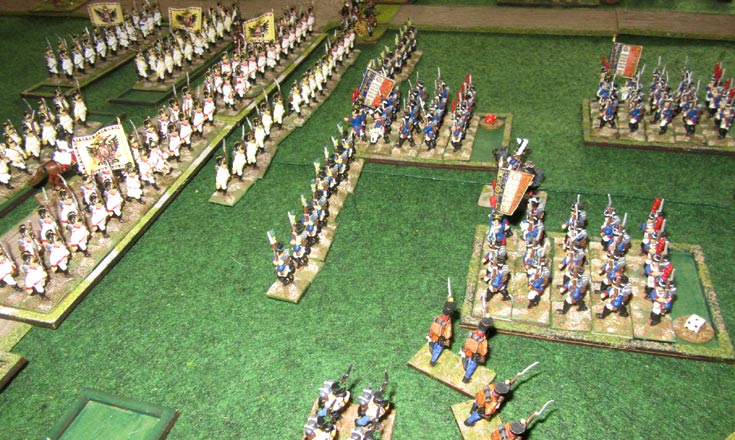
 Rather fortuitously, that was the point I had to leave the game. Campbell had duties as a “taxi dad”, and I had a friend’s 60th birthday bash to go to. So, we handed over command to MDF Michael, and beat a hasty retreat. So, for the sake of a decent after action report, I’ll summarise what happened next. The infantry attack went in with one battalion in column hitting outr line, and supported by two more, one on each flank. As you can see from the pictures, our own line was still well supported – I hadn’t stripped my reserves away yet to refuse the flank. Michael Scott – MDF Michael – rolled well, and Bart’s charge failed. The supporting battalions were repulsed too, and soon Bart was back on his start line, licking his wounds.
  I have to say, while I like the command rules in General d’Armee, the charge system is really slick too. The attacking French column got bonuses from each of his supporting units, which means that if his initial 2D6 charge roll isn’t good enough, each supporting battalion lets you re-roll a die. Two battalions let you re-roll both dice. It really works quite well, and unfortunately for Bart his rolls weren’t much good.
  That though, was only the first assault. The French came on again, and this time thanks to my cavalry debacle the Austrian line had been denuded of troops, to try to shore up the Austrian left flank. Then, on the Austrian right flank, a reserve French infantry brigade appeared on the table, and began pushing back the light infantry of the Austrian Advance Guard. They were the boys closest to the river, and that all-important bridge. Amazingly, MDF Michael held on, largely thanks to one all-important melee roll, where he rolled a double six, and German Michael rolled a double one. Such are the fortunes of war. The game was eventually declared a draw, but if it had continued it looked like the Austrians would have collapsed.
  So, what did I take from my first experience of General d’Armee. First of all, I really liked a lot of the mechanisms. I love the ADC system for command – simple, fast and intuitive. The charge system is a delight too, and is very innovative. The firing and melee mechanics are a bit less adventurous, but are rescued from being clunky by being fairly straightforward, and aided by things like those support troop re-rolls. I can’t really comment on Morale, as I didn’t really need to get to grips with that, apart from failing my tests for my cavalry. So, all in all this seems to be a great set of rules, but there’s too much to them to absorb in one all to brief sitting. We’ll certainly have to play them again soon, and in between I’ll actually try to read the rules!
Angus have you any gotten further into General D’Armee?? played any more battles whats the general consenus
I really like them, Peter. The ADC system is very clever, as is the charge mechanism. In fact, I’m busy trying to adapt them for the Seven Years War, as we did several years ago with Die Kreigskunst, as a spin-off of General de Brigade. While there are those at the Edinburgh club who really like Black Powder or Over the Hills for Napoleonic games, I can see Gd’A gaining ground.
Angus , how are you getting on with BP/OTH/GdA as I got all and am about to embark on using them for Napoleonics .
Peter
Very slowly! Work keeps getting in the way.
Work the blight on wargaming men 😀
I was wondering about your current impressions as I know OTH and GdA get good reviews
I’m atarting to read OTH at the moment haven’t games either Agus
They are both very different but both have their good points.
Thanks Angus for that ok I’ll atart with OTH as I’m very familiar with BP and Ady’s supplements