
The Battle of Kutzdorf, 1760
3rd December 2015, 2 Comments
The Seven Years War, Honours of War, 28mm
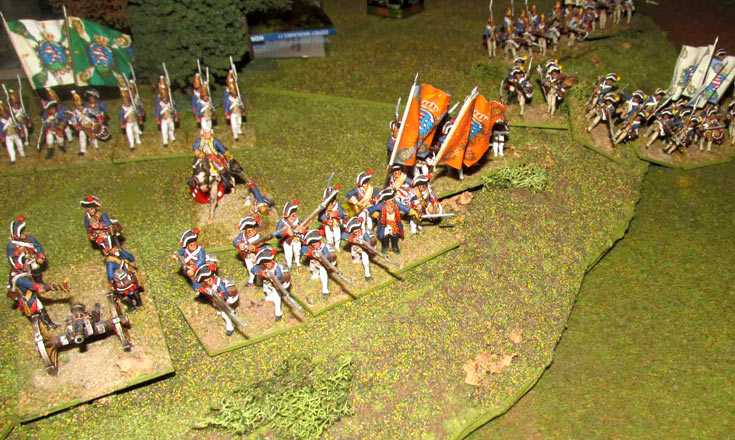
This week we decided to give the new Osprey Seven Years War rules a go using my French and Michael Schneider’s Hessians. The battle was lifted straight from one of the scenarios in the book – The Battle of Kutzdorf – and saw 2red” force holding two hills above Kutzdorf village, while a smaller “blue” force attacked them. The aim was to show what happened with a flank attack, except this wasn’t really a flank at all – it was more like an oblique attack on a well defended line. Anyway, the Hessians – red force – had six battalions of infantry (each 20 figures strong), two cavalry regiments (each of 8 figures), and two guns, divided into three brigades. The French – blue force – had four infantry battalions, two light infantry units, two cavalry units and three guns, again divided into three brigades. Victory was measured in the destruction of enemy units, but whoever hold the village at the end of the game also got an extra point. The layout was just as it was in the scenario, except we used one big hill rather than two smaller ones.
 The rules are slightly reminiscent of Black Powder – and a few other sets as well. For instance, when you want to move a brigade or “independent unit” (you get up to two of those per side), you roll to see if your troops can move, and how far they go. The table is very similar to the Manouver (sp) table from Fire & Fury. Once you get down to firing each unit has a degree of firepower based on its size and quality. We used “standard” units throughout – no superior or inferior troops – as this was a “learning curve” game. Then you’re face with a rather intimidating set of factors, most of which aren’t relevant. One reason for its length is that it also doubles as the melee table – a nice touch. On the playsheet the factors are better laid out than in the rules, and divided into firing, melee and artillery sections – meaning there are a lot less to check through. If you reach five “hits” your unit breaks, and is taken off the table. That all seemed fairly straightforward, so we set to and gave it a whirl.
 Bart and I divided our French up between us – I took battalions of the Tournais and Conde regiments on the left, a gun battery and the light infantry, while Bart commanded the La Mark and the second battalion of the Conde regiment, two gun batteries and our two regiments of cavalry. Our starting positions were dictated by the scenario, so we didn’t have any option but to put our cavalry on the right, where they faced Kutsdorf village. It wasn’t occupied at the start of the game, but it was much closer to the enemy line than to ours. So, Bart decided to speed forward and deny it to the enemy. Unfortunately he hadn’t reckoned on the manoeuvre table, which meant his troops were more tardy than he might have wished. by the time he got up there the place was defended by infantry, with a flanking line of more infantry and guns, and cavalry deployed behind it, just in case!
 Still, the aim of the game was rolling up the enemy flank – or trying to, and so the infantry headed towards the right side of the Hessian line. it was here that we learned how vulnerable infantry can be to artillery fire. Both my Chasseurs de Fischer and Bart’s 2nd battalion of the Conde regiment were forced to retire and regroup, after taking four hits in two turns. Still, my Volunteers de Cleremont – – a light infantry battalion – and my two line units trudged forward, and got involved in a firefight with the enemy which saw my Conde battalion break and run, a Hessian infantry unit do the same, and another Hessian unit retire to the rear. Still, it was clear things weren’t going well. Bart’s infantry attack was going nowhere, although his two gun batteries were causing casualties to the enemy. his cavalry were stalled in front of Kutsdorf, and my own infantry had been badly shot up.
 At that point the Hessian grenadiers charged my light infantry. The Volunteers couldn’t evade, but they survived – just – but were forced to retire. The grenadiers were forced to retire a full move too, after more musketry and a morale test. Over on our right the cavalry had come under fire from the village, and were milling about, unsure what to do next. At that point we called off the attack, as it was clear we weren’t going to get anywhere. The game played well, but its bloodiness took us by surprise, and with so many units skedaddling to the rear it seemed at times like a game between ACW armies rather than SYW ones! Still, we enjoyed them, and want to try them before Christmas.
Wonderful paint jobs and scenery. Most informative write up. Thanks
Thanks Hugh. That’s kind. However, it’s just a standard club night game. The SYW is such a colourful period that it’s hard to make games look shabby.