
The Battle of Hubbarton, 1777
18th November 2014, 0 Comments
The American War of Independence, Black Powder, 28mm
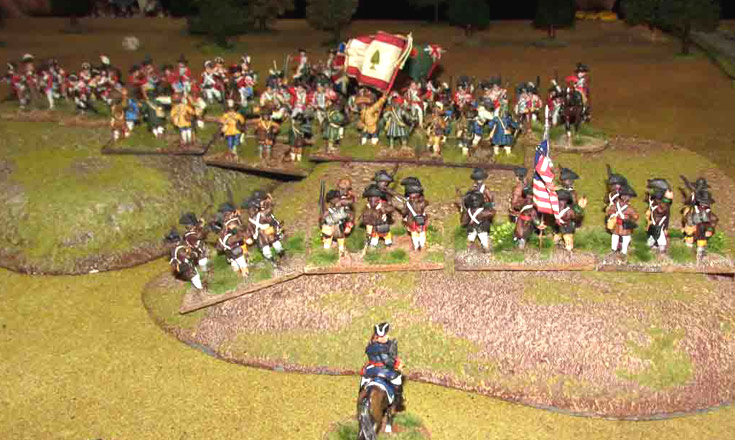
I found myself in Edinburgh on a club night, so I arranged to play an American War of Independence game with Bill Gilchrist. Actually Bill landed up both umpiring and co-commanding the Americans in this small refight of the Battle of Hubbarton. He was ably assisted by American-born wargamer Ray Neil. For those who don’t know, Hubbarton was a small battle fought in the summer of 1777, during the Saratoga campaign. Neither side had many more than 1,000 men on the field, so this was a pretty small scale affair. In Bill’s refight the British had six units, including two skirmish units of Indians and German Jaegers), while the Americans had five units, including a skirmish unit of riflemen. My co-commander was German-born wargamer Michael Schneider. Our job was to sweep the clearing of rebels, before the enemy were reinforced. Michael’s German brigade (a unit of Hessians and the jaegers) began the game by failing to appear – something they did for three turns. Meanwhile my British (a line regiment, and two small units of grenadiers and light infantry) deployed into attack formation, and headed toward the rebel-held hill. Over on my left my Indian allies advanced as far as a stream, and began a firefight with the American riflemen on the far side. This exchange of fire didn’t go to well – the Indians were outgunned and outclassed, and after just three turns they broke and ran. That left the riflemen free to harass my British regulars.
 Despite this little setback the battle began well for the British. They advanced with alacrity, and my grenadiers charged the leading American unit – the much vaunted Green Mountain Boys. The two sides were evenly matched, but my unit was small, which made it vulnerable. However, my troops were also rated “”crack” and “elite”, which surely counted for something. In the end I won the melee, and Ray was forced to take a “break test”. He rolled a “3”, which meant that Ethan Allen’s rebels headed for the hills. He also had to roll for the supporting unit behind the Green Mountain boys – the 2nd New Hampshire regiment. A “4” meant they broke and ran too,. So, three turns after the start of the game, the plucky British grenadiers had seized the hill, and sent half of the rebel army packing.
 That, of course, was where things started to go awry. For the next four turns my grenadiers steadfastly refused to move off the hill, failing every command roll they had. My plan was to roll them, the light infantry and the 24th Foot over to the right, to take on the remaining two American units, but instead the grenadiers remained stationary, a nice target for the American riflemen. Casualties (or rather casualty markers kept piling up, but fortunately they passed their morale tests, even though one of them required a re-roll, using the “stoic” rule. However, the Germans were now on the field, but their advance was agonisingly slow. In the end the 24th moved off the hill towards the American line, while the light infantry deployed on their left. Phase two of the battle was about to begin.
 The 24th were ranged against a unit of New York militia, which in theory should have been easy to deal with. Instead they gave as good as they got, after the British line failed to charge home. Instead the two sides traded volleys, and at one point the British even had to fall back to regroup, to lose some of their growing pile of casualty markers. On their left the light infantry got a bit cocky and deployed on the flank of the rebel militia. Their added firepower didn’t achieve much, and the next turn they were charged in their dangerously exposed flank by the fourth rebel unit – the 11th Massachusetts. Amazingly the light infantrymen held their ground, and the melee continued…. and continued … and continued…. In the end the protagonists fought eight rounds of melee, with first one side having the edge, then the other.
 Over on the British right the 24th Foot had recovered its composure and was back in the game, this time supported by the German Jaegers. After two turns of firing the New Yorkers broke and ran. That left only two American units on the table- the riflemen and the Massachusetts continentals, who were still fighting their long-running melee. By now the grenadiers had moved up to support the light infantry, while the Hessian line regiment deployed on the left flank of the lights. In Black Powder this gives the British two supports, while the Americans no longer had any supports at all. Suddenly it was all over – the valiant 11th Massachusetts finally failed a break test and fled the field.
 With only the American riflemen left in the game the British were declared the undisputed winners. it was a strange game – an initial easy victory was followed by several turns of brutal slog. That though, is what made the game fun. While Black Powder mightn’t have been the best rules for our Sudan game, they were perfect for a club night game like this, using two more evenly matched armies.