
The Battle of Detmold, 1759
6th September 2018, 3 Comments
The Seven Years War, Seven Years , 28mm
This week saw a return to the Seven Years War, and the playtesting of the new Seven Years rules (working title). Michael has been tinkering again, so this was all about seeing if these modifications made any sense. As usual it pitted a Western Allied army against a French one, and was what is probably best described as a “divisional level” action, fought out on an 8×6 foot table. There wasn’t any real scenario or objective – this was one of those games where two matched armies line up and fight, without any real reason behind it. Still, that way nobody could whine too much about having an unfair advantage. Actually the Allies had an extra command dicve, but one of their four cavalry units was downgraded to light cavalry. Both sides had nine infantry battalions in three brigades (one of their units being grenadiers), with a battalion gun attached to each brigade. Each side also had two brigades of cavalry, each of two regiments, plus a light infantry unit (in my case a legion – Fischer’s Chasseurs), and a battery of heavy guns.
  The middle of the table was dominated by a small village – Michael wanted to try out his town fighting rules. So, we both deployed facing each other, about 4 feet apart, and then got stuck in. mark, Alistair and I ran the French, while “New” Michael, “Mad/German ” Michael and Bart ran the Allies. Our plan – such as it was – was to lure Bart into a sort of killing ground to the right of the village, while I occupied it, or at least contested it with the enemy, who no doubt would also head straight towards it.
  The killing ground idea relied on us moving our gun battery onto the hill on our far right flank. that way it could enfilade the Allied cavalry and British infantry if they tried to push forward. Over on our left, Alistair with four battalions and a cavalry brigade had the job of holding off the bulk of the Hessian contingent – so he was outnumbered over there. His job was to hold on until we’d chooped up Bart’s cavalry, and stymied the British foot.
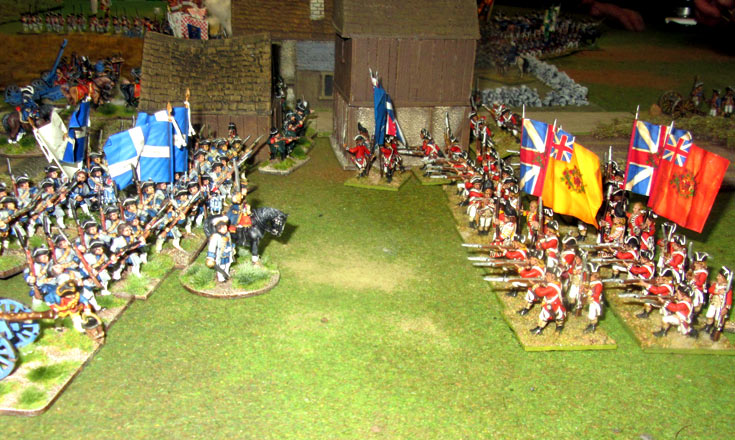
  True to form Bart surged forward with his horsemen, while “New ” Michael occupied his half of the village with British foot and Hessian jaegers. I did the same with the Chasseurs de Fisher, supported by a couple of battalions of French foot. The cavalry clash on the left ended badly for Mark, whose French regiments were driven back. Still, not only did they rally, but the leading Allied regiment was forced back to regroup. Bart then tried riding down one of Mark’s infantry supports – a battalion of La Couronne regiment, which stood firm and routed the British light dragoons who charged them.
  That meant there was now a mass of disorganised Allied cavalry on their left flank, and their guns were screened by them, and by the British foot moving up to plug the gap. That’s when Mark’s guns reached the hill and unlimbered. They were screened from the British guns by a small wood on their right, and so the only way Bart could counter this was to charge the guns. HE tried to do just that, but his cavalry balked at the idea, and retired. Next he moved up a British infantry battalion, but that exposed his flank to the now fully ordered French cavalry. In other words he was stymied, and the guns kept on pouring shot into the Allied ranks.
  That and the continued good fire discipline of La Couronne regiment turned the battle. All of Bart’s units were now either shaken, disordered or routing, save for his guns (which were blocked by his own troops), or a small reserve of British foot, deployed behind the village. In the centre my own light troops were adding to the carnage, but neither side had the strength to drive the enemy from the rest of the buildings. I tried to break the deadlock by charging through the village with the mounted contingent of my chasseurs, but they were disordered, and so couldn’t charge the enemy battalion guns in front of them.
  Over to my left the La Mark regiment was under pressure, and eventually its first battalion was routed by the Hessians. Further to the left Alistair was also under pressure, and his outnumbered Swiss and French troops were barely able to hold their ground. That’s when “German” Michael gambled with his own cavalry. He charged a von Hodenberg’s Hanovarian horse towards a gap in the French line, but got stopped by fire from the von Reding Swiss regiment, and a battalion gun. I then finished the job by bringing up my reserve – a battalion of the Grenadiers de France, who routed the Hanovarian horsemen. A similar thing was happening on Alistairs far left, where more French fire drove off another Hanovarian unit – the von Briedenbach dragoons.
  The only bright spot for the Allies was that the Hessian foot finally managed to rout a Swiss battalion, which added even more pressure to Alistair’s flank. However, it was clear that the Allied had now run out of steam. On their left flank they were on the verge of being swept from the field. All Mark had to do was to pound away with his guns for another turn, then unleash his supporting cavalry. In the centre I wasn’t making any headway in the village, but at least I’d rallied the La Mark regiment, and plugged our centre. On the Allied left “German” Michael was still making headway, but even he was slowing down thanks to the loss of his cavalry, and the threat posed by Alistair’s horse. That was where we stopped the game.
  The rules worked quite well, and for once we actually got to play in buildings. We didn’t storm them, so perhaps we need to try that next time. Interestingly the command and control rules meant that when the gap appeared in our lines, and the Hanovarian cavalry trotted forward, our force couldn’t sent support “staff points” to Alistair, as he was our of command range. So, for a brief turn or so he was on his own. That worked fairly well. Also, with two new players to the system, it worked well, and they picked it up fairly easily. So, a qualified thumbs up, the playtesting though, will continue into the autumn and winter.
Great battle, good to see a French victory, their reputation wasn’t so great in the real SYW. Nice collections too.
Interesting to see how your urban combat rules will cope with stormings. There is quite a debate as to whether defenders have a big advantage or not. It seems a lot of times the attackers bundled the defenders out in short order only to themselves be kicked right back out by a counterattack. You read a lot about villages and towns changing hands back and forth in 18th-19th century battle accounts.
I under stand you are looking at modding the Dave Brown GDA rules for this .. so am i
Are you using them for this battle or am i barking up the wrong tree as i really like them and intend to use them with mods
Yes – German (or “Mad”) Michael has simplified and adapted them, and we are trying them out. Still very much in the playtesting stage, but they actually sort of work.