
The Advance on Courcelles, 1918
19th October 2017, 0 Comments
The Great War, Chain of Command, 28mm
When we’re at a loss about what else to do we tend to opt for hain of Command (or CoC for short). This time we played a game set in the Great War, using the amendments posted in some Too Fat Lardy special. We call this version Muddy CoC. In our game, there was something of a role reversal. German Michael played the British, while Peter and I both played the Germans. The Germans were attacking, so we had two platoons, while the British had one. We fought the game on a 6×4 foot table, using our depressingly realistic “Verdun” terrain tiles. This game though, was sent in the north part of the Operation Michael battlefield – the German spring offensive of 1918. Our objective was to capture the entire British line, and to wipe out or drive off all of the defenders. That was going to be a tall order, despite having a 2 to 1 superiority in troops. That was especially so in that Peter had an elite platoon of stosstruppen, while my platoon of German reservists was raw. All the British were classed as elite.
  Still we had some support – a tank called “Lotti”, a field gun, a machine gun and a grenatenwerfer. The British had a tank too, along with a machine gun. Neither side was allowed any artillery by Michael, who came up with the scenario. He also supplied most of the troops, apart from the raw German troops in plain fieldgrau, which were from my toy stash. While we had “jump off points”, we just deployed in our respective trenches. We were actually in what was the British front line trench, and the British setup in their second line one. A communication trench snaked between the two.
  Peter and I spent a minute figuring out out options. There weren’t really many of them. We had about 2 1/2 hours to win the game – or rather before packing up time, which was pretty much the same thing. So, the clock was against us, especially in a Muddy CoC game, when units get slowed down by enemy fire a lot, or by being pinned. So, we simply had to keep moving forward, and hope for the best. That communication trench looked promising, and I planned to use the tank to “shoot my way in”.
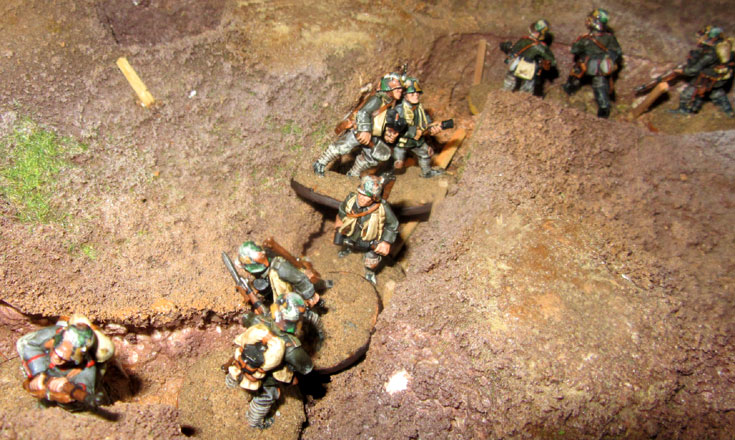
 When we went over the top I found I was having a fairly easy time of it – at least for the first few rounds. this was because Michael was wisely concentrating all his fire on Peter’s elite stosstruppen. They started taking casualties – lots of them – as they advanced across no-man’s land, moving from shell-hole to shell-hole. Machine gun fire raked the area, as did the mass rifles of three of the four British sections. The fields of Northern France weren’t a particularly safe place to be that morning!
  By then though, “Lotti” had come on. As she was slow to move, and prone to bogging down, she advanced from one firing position to the next, and in each one she targeted knots of British defenders. At first she went for a gun pit in their trench line, but when we found out there were just infantry there we opened up on the machine gun that was making life hard for Peter. Eventually we silenced it through suppressing fire and casualties. That, unfortunately for us, was when the British tank arrived.
  What followed was a tank duel, with “Lotti’s“ one gun firing at the British tank, which fired her two back. She was a Mark V “male”, with two 6-pounders, and so in theory she outgunned us. However, a lucky couple of shots from the German crew not only damaged their British opponent, but drove her back. By now Peter’s platoon was in a sorry way, and unable to do very much die to “hit” markers, and pinned units. So, it was up to the reservists to win the day.
  We advanced like the stosstruppen had, leaping from crater to crater, but thanks to silencing that machine gun and the casualties Peter had caused on the British there wasn’t a lot of fire coming back. The British platoon had four sections, and two of them were either wiped out or as badly beaten up as the stosstruppen. I was firing at one of them, holding the line in front of me, but where was the fourth British section?
  I soon found out. Michael launched a charge down the trench, and in a fierce hand-to-hand fight he wiped out one of my squads. However, most of his section had been killed too, and when I counter-attacked up the communication trench I not only wiped the survivors but took out that pesky British machine gun team too, which was sitting there trying to recover from being pinned. That evened the score a bit, with one active British section left, fighting two advancing German ones, with a third moving up in support.
  So, in what was the penultimate turn I ordered my men up and charged the enemy trench. We captured that knot of British in the weapons pit in front of their line, forcing the section to flee. I even managed to capture their NCO too, who was hors de combat , lying in the main trench. This though, wasn’t enough. Michael still had the remnants of two battered sections at either end of his trench line, and a suppressed tank. We held about half the British trench, but while it was a great achievement – especially for a raw platoon of reservists- it still wasn’t enough. Michael’s victory conditions were that we had to clear the table, and he was still hanging on by his fingertips. So, the game ended in a Pyrrhic British victory. All in all it was a fun little game, and thanks to those tiles it looked terrific.