Pushing on into Fontenay, 1944
19th May 2022, 0 Comments
The Second World War, Chain of Command, 28mm
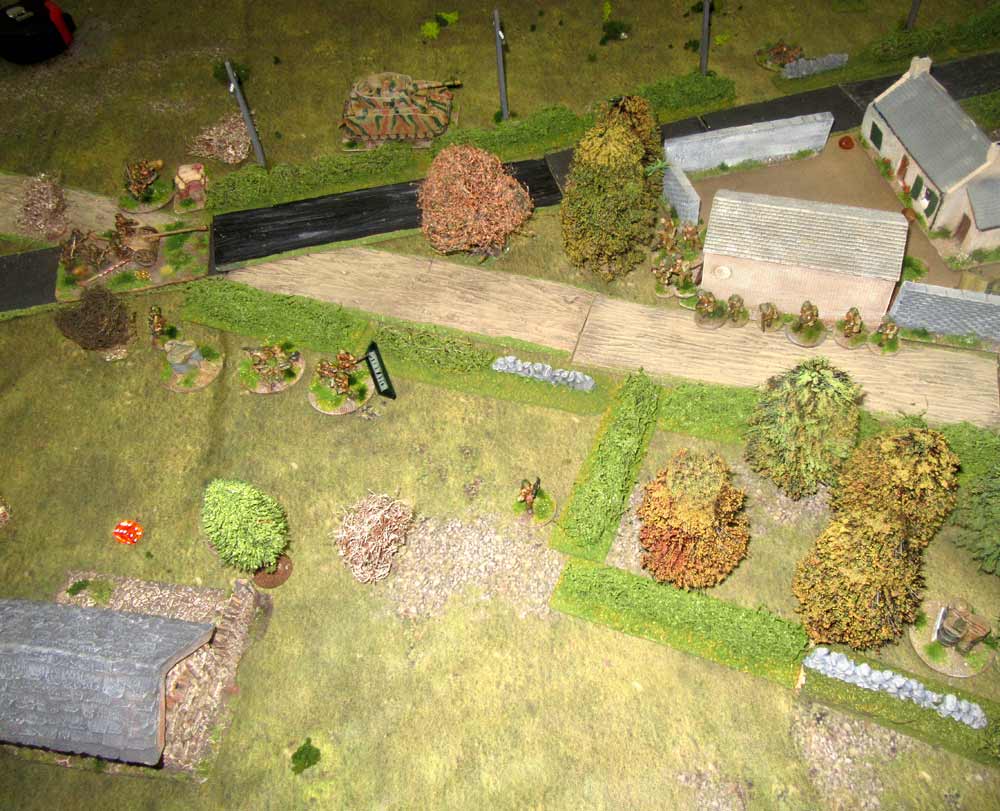
We returned to our Chain of Command pint-sized campaign this week – “Operation Martlet”. This was the second scenario, called “Pushing On”. Essentially it saw a platoon of the Royal Scots Fusiliers moving deeper into the Normandy village of Fontenay-le-Pesnel. We fought Scenario 1 “Probe into Fontenoy” a few weeks ago. Now the Scots are roughly 400 yards down the road to the east (the D18), where they’ve come up against the German’s forward defensive line. their job is to crack through it, then head deeper into the village, and the main German defences. As before, Sean played the Germans, Nack the British, and I sort of umpired.  Here’s the layout for the game, played on a 6×4 foot table. The objective for the Fusiliers was to break the German defensive line, while the Germans, from III/26th SS Pz. Gren. Rgt was to break the attackers. For this one, Nick had 16 support points to play with, and Sean had 7. the British blew theirs on two Shermans and a Forward Observer, while the SS used theirs on a PAK 40 AT gun and an entrenchment for one LMG team, which Sean put beside the road, on the German start line.
  To make things more interesting, the morning mist that hindered the British advance in Scenario 1 was still around, meaning that Nick had to roll to see if his troops made it onto the table. It was a 50/50 chance, and if you failed twice then the unit stayed off, blundering around in the fog. Sean was hampered by British pre-planned artillery, which meant his own troops had a similar handicap on Turn 1.
 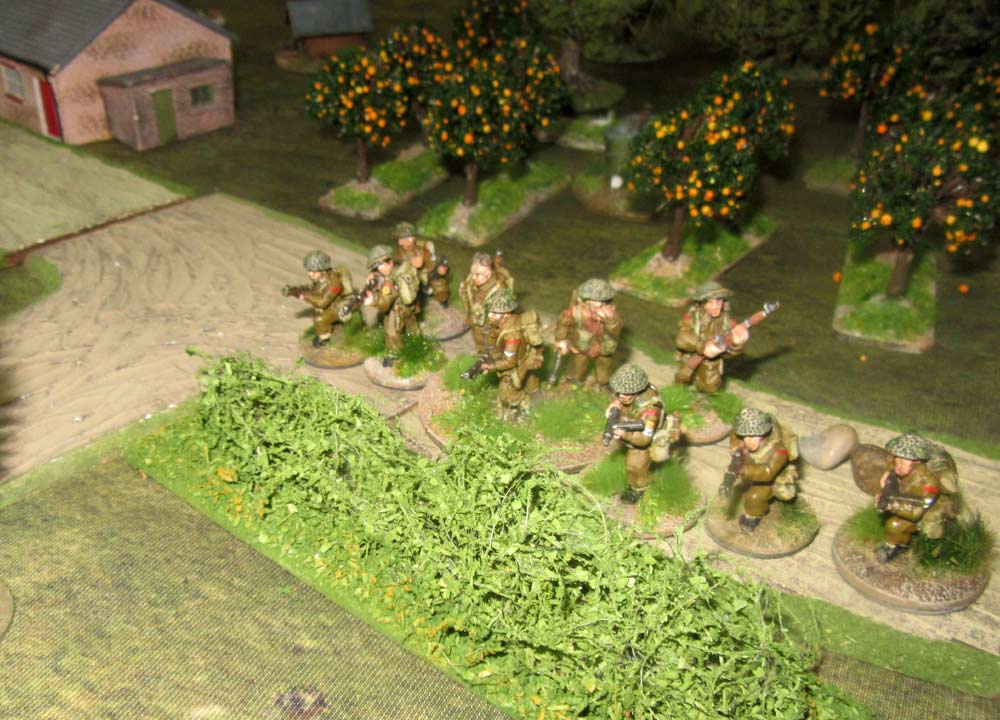 The game began cautiously, with Sean bringing two squads on, which he placed in the walled farmyard in the centre of the table, and around the little hedged copse or orchard to the north of it. Meanwhile Nick had no end of trouble with the mist, and only one section came on during Turn 1. He used it well though, deploying it on the north-west of the table, beside the “T-shaped” track junction.
 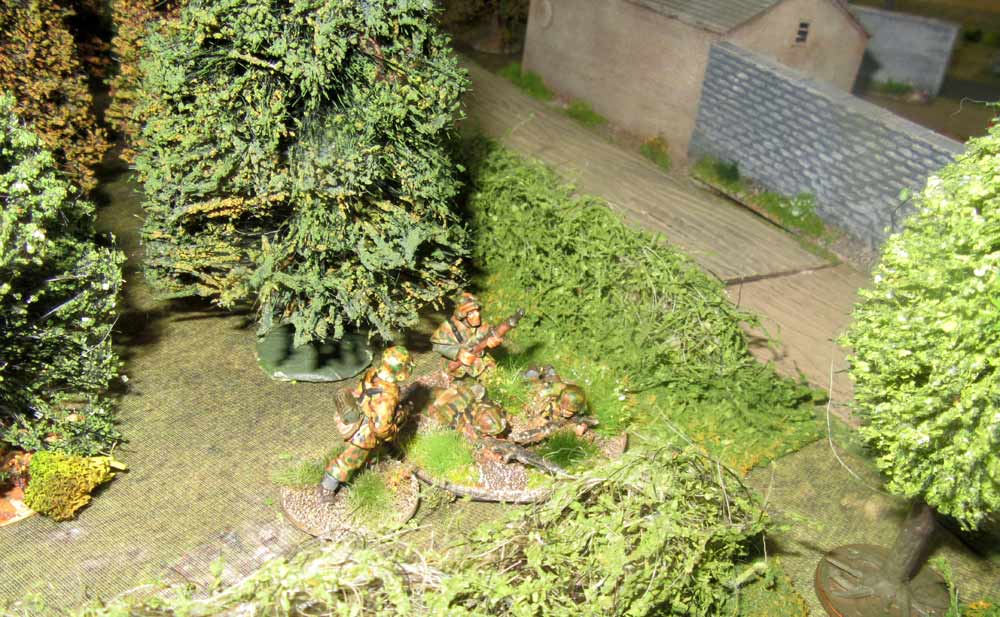 The British couldn’t move, but they could fire. One of the panzergrenadier’s LMG teams was in the adjacent field, and so the British opened up, and wiped out the German team. That dropped Sean’s Morale Tracker down by one point to 8 – the same as the Brits. His command roll with three 6s also ended the turn. Actually, in this game there would be a lot of 6s in the command rolls, which meant both players often got to go twice.
 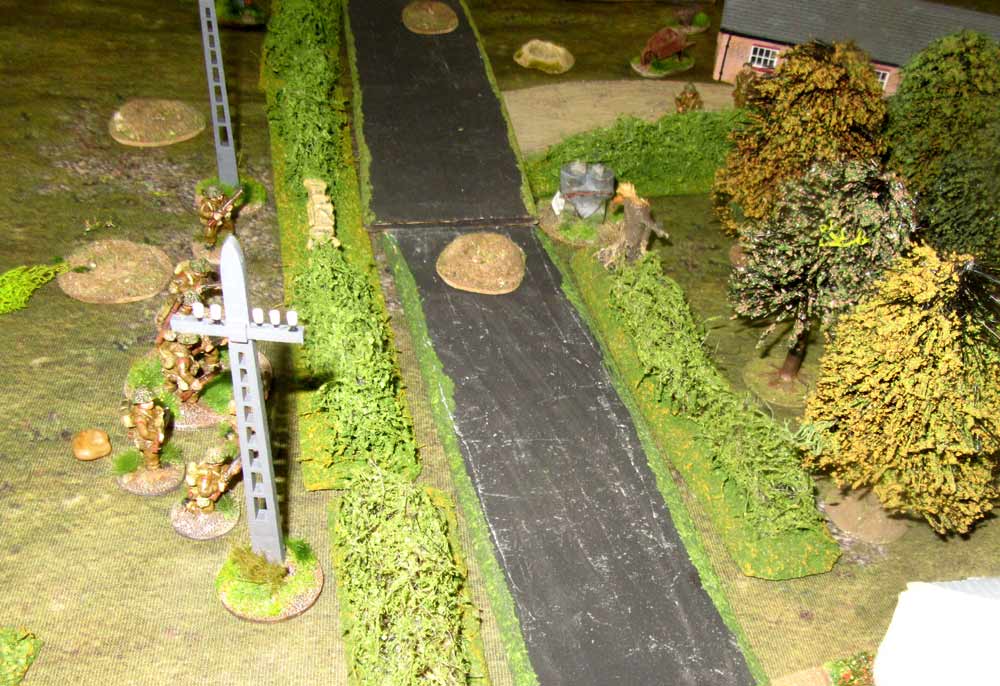 Sean had a jump-off pint in the triangular-shaped orchard to the west of the farm, so he moved one of his LMG teams forward from the farm to protect it. Nick responded by deploying a section behind the hedge across the road, and blazed away at this German LMG team. Given the mist he was lucky to get it onto the table. He also move his other section up to the western edge of the triangular field, so it could fire at the isolated German LMG team too, which pulled out of sight, pulling back deeper into the orchard.
 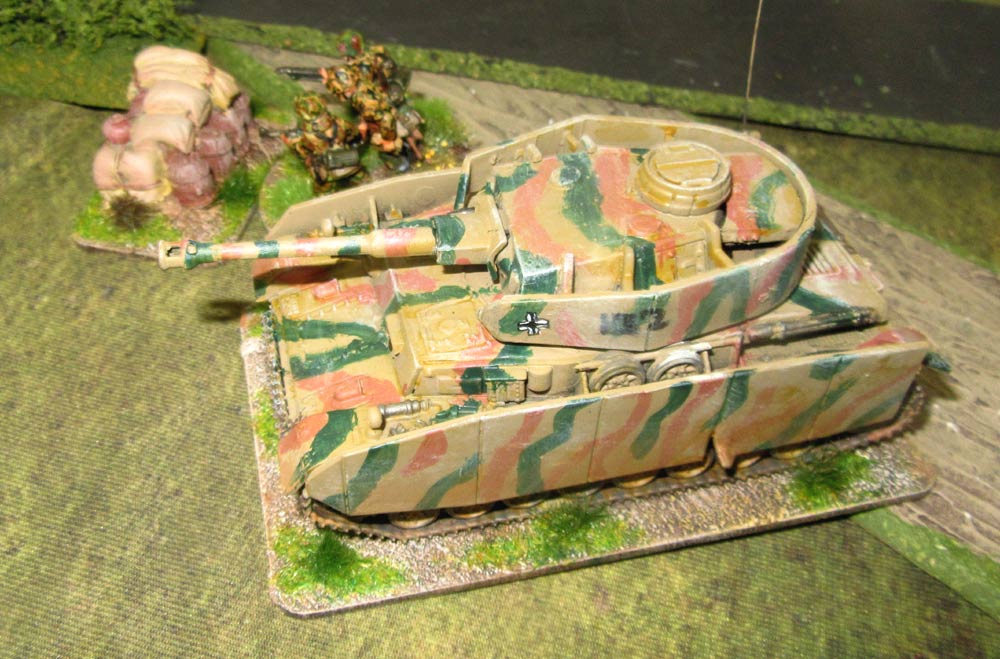 The sight of the second British section lining the hedge was too tempting for Sean, so he countered by deploying his third squad, putting one LMG in the entrenchment to the south of the road, just west of the “diagonal cross-roads”. As if that wasn’t enough he also put his tank there too – a freebie asset to bolster up the understrength panzergrenadier platoon. Both the LMG and the tank opened up on the British section, which didn’t have any cover as the fire was coming straight up the field at them.
  Sean even had a double phase, and by the time the smoke cleared seven men were down, including the Corporal, who it turned out was only lightly wounded, and bounced back into the game the next phase. He was down to three men other though – his Bren team, and he pulled back at the double, hiding behind a hedge to the south, then heading west to the safety of the western table edge. On the other lane by the triangular orchard the remaining British section advanced into the orchard, and drove the LMG team back.
 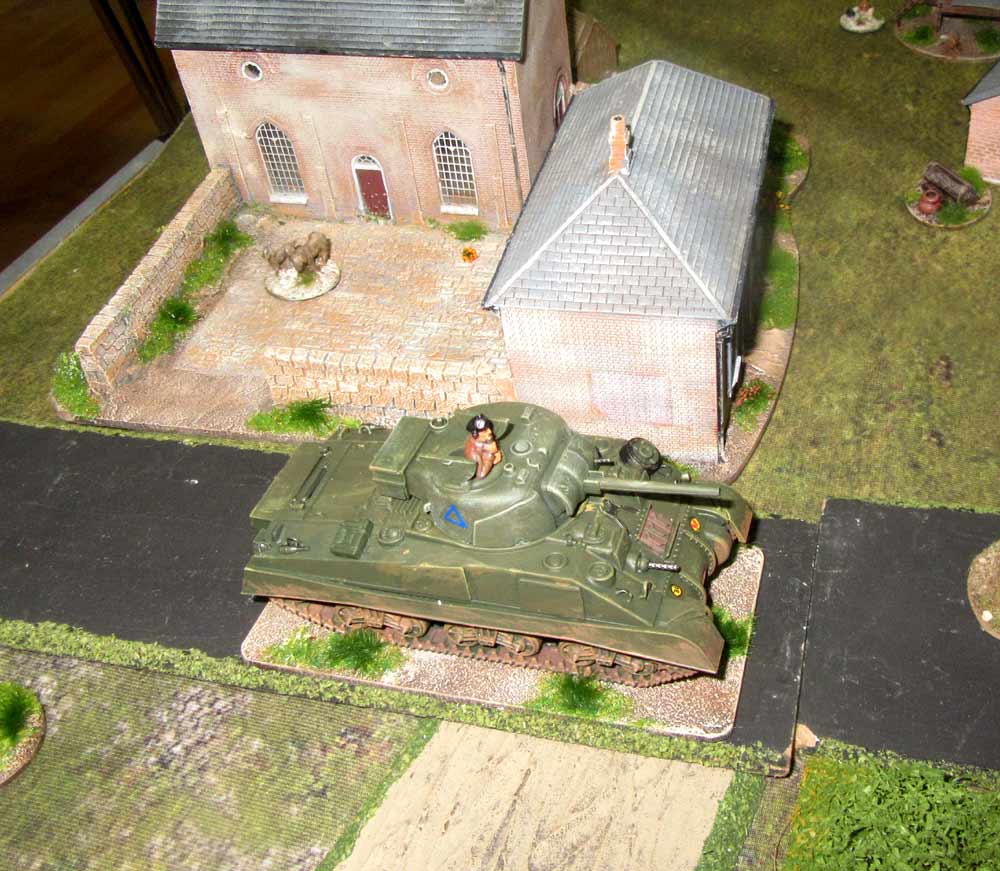 It was the British turn to pull a stunt though, and Nick deployed his Sherman, He should have had two, but one got lost in the mist, along with his third infantry section and his platoon commander. It seems that Subalterns really can’t read maps after all. The tank though, from A Sqn. of the Sherwood Rangers began trading shots with the Panzer IVH down the main road. A hedge between them made the shots tough ones, but both Sean and Nick scored hits, but didn’t do anything other than add the odd Shock marker.
 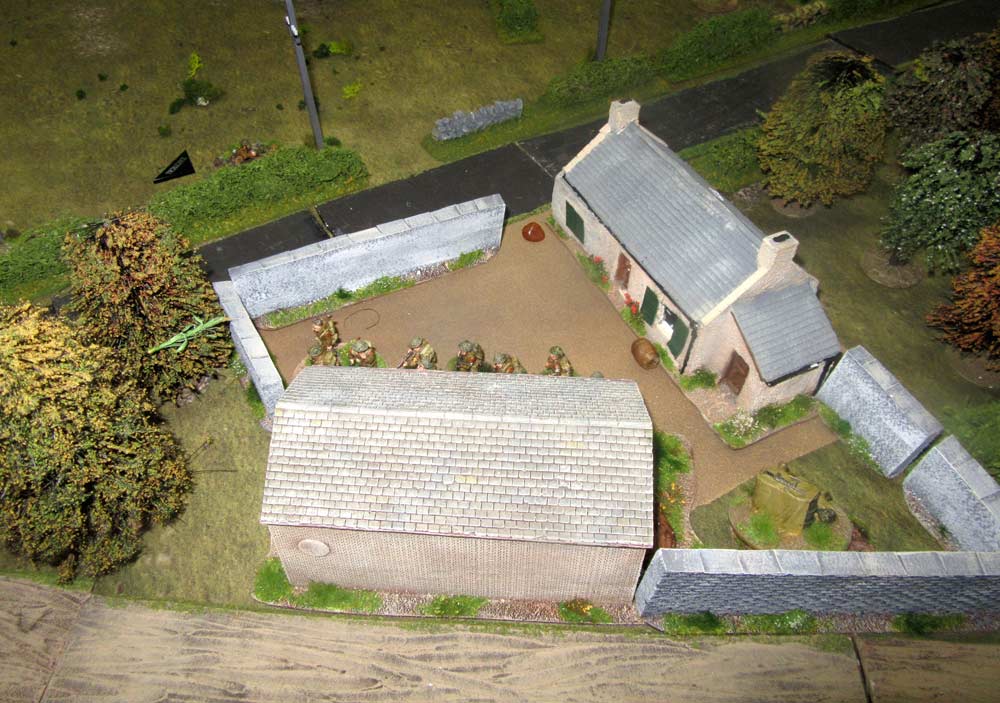 Then, true to form, Sean played his ace card, and deployed his PAK 40 astride the main road. It had a clear shot at the Sherman, and – failed to hit it. Nick had enough of this though, and pulled his tank back into the lane to the north of the road, behind the triangular orchard. As he did though, a lucky shot from the PzIV hit her, and knocked off a track. The Sherman was now immobilised. Nick though, had now deployed his own ace – his FOO, who called in a mortar barrage on the farmyard. the ranging shot had actually wandered around the table for a few phases by now, as the initial shot went very wide. Sean decided to get out of the way, and pulled his infantry back out of the farm. Then he waited for the British to attack him.
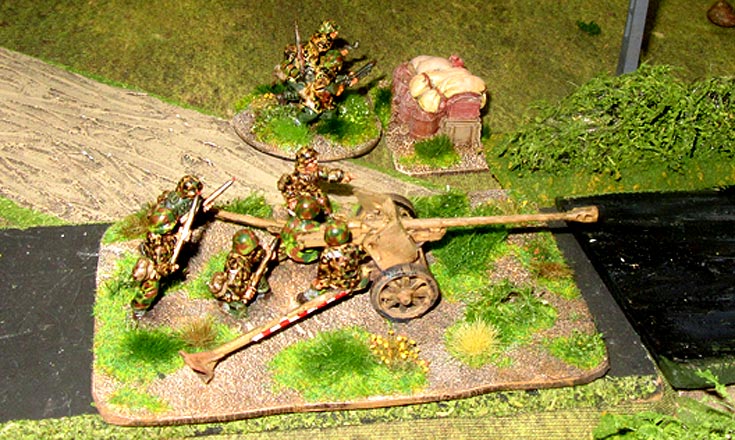
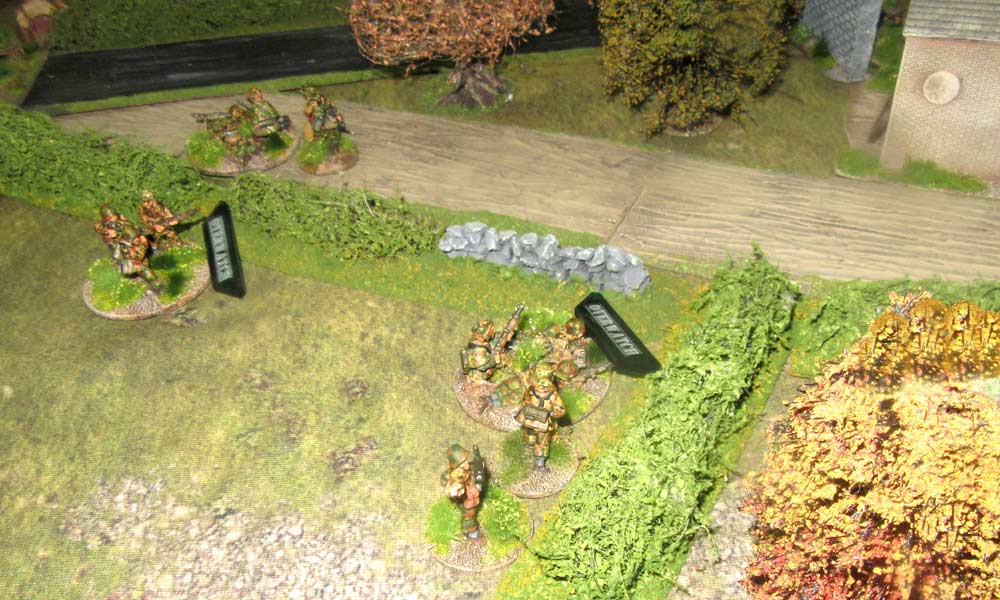 It was a good-enough plan, except for one thing. The turn ended again, and Nick was really lucky calling up another barrage mission. this time he aimed it at the crossroads, and didn’t bother with the ranging shot – he went for the full barrage. it wandered slightly, but that only made it more effective. It fell on all of the remaining SS panzer grenadiers, and the PAK 40. Only the panzer was out of the beaten zone. Although he only suffered a couple of casualties, it was clear that things were about to get very painful. So, the Germans withdrew off the eastern table edge. This, after all, wasn’t the main defensive line. that was down the south-eastern side of the “diagonal crossroads”. So the “Pushing On” scenario ended in a British win. Next game we’ll be fighting in the very heart of Fontenay.