
Malden and Medford , 1775
27th October 2012, 0 Comments
The American War of Independence, Black Powder, 28mm
You won’t have heard of the running battle of Malden and Medford, as this was a fictional game – a tabletop teaser. Of course it was based on the very real events that took place a few miles away in Lexington and Concord. The thing is, the British garrison in Boston made several forays into the hinterland of Massachusetts that spring, and one of them was to Salem, just up the coast from Boston. Our game revolves around the idea that the British column was on its way back from Salem, and was now just ten miles from the safety of Charlestown and Boston Harbour. Unfortunately the rebels had been gathering all afternoon, and as the British left Malden they began firing on the redcoats. Essentially this was a repeat of the fight around Concord and Lexington, only set elsewhere, so we didn’t have to be a slave to historical accuracy. in fact we even included a small brigade of Hessian troops in the British force, even though they didn’t arrive in the Americas for another year. We wargamers can be fickle that way… The game began with the British in the village of Malden, where they had just finished searching the houses for rebels or their incriminating paperwork. The trouble began when they formed up to march out of town. The British force consisted of two small brigades – one of two Hessian units, supported by a jaeger skirmish unit, and two British units, with an attached light infantry detachment. This force was accompanied by a gun battery, and of course a commander. Things began reasonably well for Alan, the British player, and then deteriorated fast. He began by sending his skirmishers to clear the high ground to the right of the road, while one British unit and the Hessians formed up on the road and stepped off towards Medford. The British unit (7th Fusiliers) led the way, while the combined light infantry battalion brought up the rear – largely because it kept failing its command rolls.
 At the start of the game the British could see units of minutemen formed up to the north-east of Malden, with riflemen lurking in the nearby woods. Chris the rebel commander had no idea when or where his reinforcements would arrive – they simply had to be thrown into the fray as they appeared. In fact as the umpire I was busily drawing cards for their arrival, and for any special events. The gout afflicting the British commander was caused by event cards, and lowered his command dice so much that the British light infantry didn’t get moving until Turn 3.
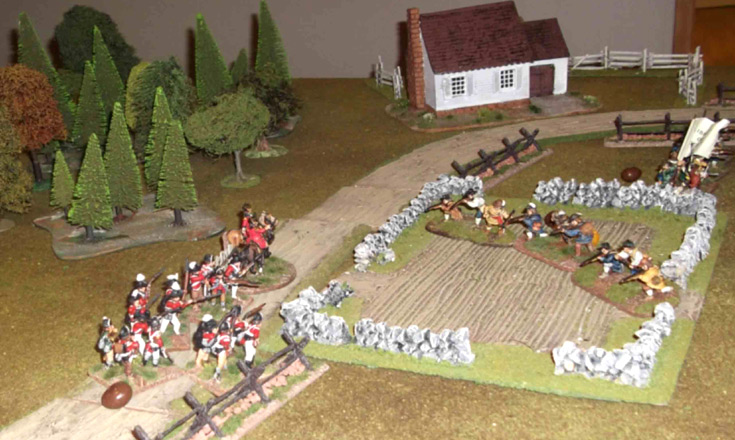
 By then the Hessians had reached a fork in the road – with both tracks leading to Medford. The British commander decided to cover both options, by holding the ground between the roads. This wasn’t as strange as it sounded, as by then the Americans were massing, and holding a central position seemed a sensible enough move. Unfortunately the rebels had already begun to cause casualties, and the minutemen were now covering both roads – and the high ground between them. While the British and Hessian skirmishers tried to keep the enemy at bay the 7th Fusiliers formed up and fired on the rebels massing on the western road, which ran between two wooded hills. The British skirmishers cleared the westernmost hill, while the jaegers tried to hold the eastern road open for the British Light Infantry battalion and the gun detachment. They failed miserably – instead they were driven off by accurate American rifle fire.
 At that point the main threat to the British seemed to be the clumps of minutemen to the south-east of Malden, who were now firing on the light infantry as they emerged from the village. However, a wave of reinforcements on the west road allowed the American player to go over onto the attack. The British gun had deployed just beyond the fork in the road, to clear away the minutemen outside Malden. Its rear was protected by the Hessians, and all seemed well. that all changed in the course of Turn 6, when the rebels on the central hill broke the Hessian unit to their front, while the second Hessian unit (von Bose’s Regiment) was charged in the flank and rolled up. The American tide then swept onward to overrun the now hopelessly exposed gun crew.
 After that debacle the British were hard pressed to make it off the table. However, this is exactly what happened, as the Fusiliers crossed the table to reach the easterly road, while the light infantry finally decided to ignore the minutemen to htier flank and pressed on up the same road. By Turn 8, when the game came to an abrupt end (the Rebel Player had an upset stomach) things were looking slightly better for the British. The jaegers had reached Medford, and the 7th Fusiliers and the Light Infantry were all within reach of the town, despite the large number of minutemen hanging around their flanks. The game of course was a rebel victory – after all , they’d destroyed almost half of the British force. However, honour was restored somewhat by being able to extract the remains of the British force from the table. With hindsight the British player should have chosen one road and marched along it with overwhelming force, which would have left half of the minutemen trying to cross the table to intervene in the fight. Too much dithering, and a lack of clear direction gave the Americans the chance to mass their forces, and overwhelm part of the column through firepower. It was an excellent little teaser though, and no doubt I’ll run it again some time. It also worked very well with Black Powder.