
Disaster on the Axona, 57BC
11th May 2017, 4 Comments
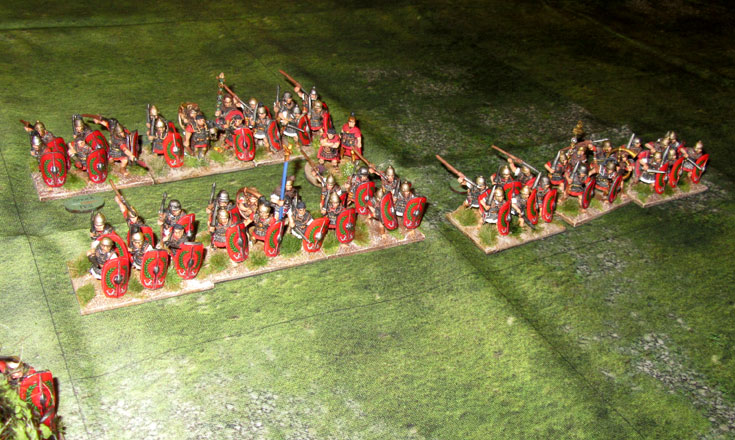
The Roman World, To the Strongest, 28mm
I’d been meaning to play an Ancient game for a while now, especially after I’d finished expanding my Marian Roman army. So, when Ken Pearce offered a battle using his Gauls I jumped at the chance. So, battle was duly joined on a fairly open plain in the valley of the Axona (Aisne), where Caesar’s legions were campaigning against the Belgii. In To the Strongest the game is played on a barely-noticeable grid system – we used 8″ (20cm) squares on an 8×6 foot table. this means you don’t need tape measures – and dice are done away with too, as we use playing cards to activate units, and to fight with them. In this battle the barbarian Nervii played by Ken, Derek Hodge and Dougie Trail, while Jack Glanville and I commanded the Romans.  Our forces were equal in points – we both had 150 point armies – but the composition of the armies varied a bit. We had eight 18-figure “cohorts”, split into two “legions” (the IX and the X), each lead by a general (legate), and supported by a cavalry wing of two 9-figure alae of Allied Gallic cavalry, and two 6-figure units of Numidian light horse, all led by a tribune.Each legion also had a skirmish unit of 9 figures – Spanish caetrati for Jack, and Balearic slingers for me. The Praetor commanding this powerful little force was Titus Labienus.
  For the Gauls, their ten 36-figure warbands were split into two commands, each led by a tribal chief (played by Ken and Derek), with Ken’s Piercix in charge. Both commands were supported by one or two skirmish units with slings or javelins, while over on the left Dougie commanded thee units of Gallic cavalry. Thanks to our Numidians we out-scouted the Gauls, and so they started their deployment first. In fact we both opted for opposing lines of infantry, with the cavalry massed on one flank (the Roman right). I took charge of the IX Legion, on our left, and the cavalry, while Jack controlled the veteran X Legion. Both armies had a fort behind their lines – our fortified one being garrisoned by my slingers.
  With the battle lines set, we kicked off the game with both sides slowly advancing towards the centre of the table. Both sides kept their cavalry back for the first few turns, waiting to see how the infantry fight would pan out. Strangely, the Gauls sent a slinger unit off ahead, to harry the Romans. this worked – try as we might we couldn’t get to grips with it, and it was still being an irritant right up until the moment the Gallic warbands launched their hell-for-leather charge.
  In To the Strongest the way the activation works is quite straightforward. You play a card for each unit or group of units in the same box, and these can then move forward a box, or charge the enemy in the box in front of them. you can activate the unit again, but this time you need a higher card – two higher if you’re a “deep” unit like a Gallic warband. Shooting works the same way – you activate the unit, then shoot, needing an 8 on the card to hit. Incidentally, we use mini playing cards, bought on e-Bay.
  As for melee, units usually need a 6 or more to hit, but that becomes an 8 or more if they’re demoralized. You get saves too, again on then turn of a card. Roman “regular” units are removed from the table if they get disordered a second time, while being “deep” units, warbands stick around until they suffer their third disorder. Light skirmish units are lifted off on their first disorder. Each time a unit is lost you surrender a victory marker to the enemy. Both sides had around a dozen of these in a little cup. Once cup is empty you lose the game. Simple.
  Right, back to the game. As the infantry units clashed (it was the Romans who went in first) – the Roman cavalry advanced so that the Numidians could pepper their opponents with javelins. I got it wrong – I didn’t do much damage, and then lost a Numidian unit which failed to evade when charged by the Gallic horse. That was our first loss. However, with the infantry melee gaining pace, both sides were braced for more casualties.
  We threw our pilums (or is it pila) before contact, which helped a little, but essentially both sides didn’t break. instead most units became disordered, but remember – the Gauls can suffer more punishment thanks to their larger units. We were doing OK up to this point, having held the Gauls, and we had high hopes of the tide turning in our favour. That, of course, was when disaster struck. The “cohiort” on the right of the IX Legion’s line failed its save, suffered its second disorder, and was lifted from the table. the victorious warband moved into the gap. that though, was only the start.
  We failed our activation, so Ken went again – this time playing a blinding series of move cards that saw the warband turn to its right, then charge each of my remaining three units in turn. Effectively he rolled up the entire line. The card gods were in his favour that day! So, within a turn I’d lost four units – an entire legion. even the legate went down under a welter of Gallic blows! All I had to show for it was a few disordered Gauls, and that pesky slinger unit, which I’d finally managed to chop to pieces.
  Jack was having a bit more luck. He saw off a warband, and a unit of Gallic skirmishers, but the collapse of the legion to his left meant he was now hopelessly exposed. First he lost his caetrati, when they failed to evade a Gallic cavalry charge, and then he lost a legionary unit, which had been holding up the left of his line. that used up the last of our victory medals, and so we conceded the game. Down below you’ll see Derek (left) and Dougie, poised to deliver the knock-out blow. Despite this ignominious performance of Roman arms we all enjoyed the game, and vowed to play a lot more To the Strongest battles in the future. The system is exactly what we want – fast, intuitive, and it really forces you to think about what you’re doing, to get the best out of your army. All in all, despite suffering my worst wargame defeat in ages, I had a blast!
Hi Angus,
Great account. Odd, isn’t it, that even getting hammered In a game of To the Strongest doesn’t stop you having a really fun game? Just as well given my success(?) record!
Andrew
Actually Andrew, I like the way they penalise bad generalship. As I was outnumbered I extended my line to cover the flank, and paid the price of not having a reserve. I hope I’ve learned my lesson…
Angus,
An excellent point, they have two qualities I really admire in a set of rules – simplicity and subtlety. And because flank and rear attacks are potentially so devastating, keeping your line intact, and maintaining a reserve are really important. You can also see the advantage, if you are short of units, of keeping a second line unit ‘refused’ at the end of the line, to flank any outflankers. Great rules.
Andrew
Great report as always, Angus, and I heartily agree with you as far as To the Strongest. It’s my favorite (now only) ancients rule set.
I have used it several times at convention games and the players always really enjoy themselves, no negative feedback thus far.