
Ambush on the Camelon Road, 1568
27th January 2022, 4 Comments
Mary Queen of Scots’ Wars, The Pikeman’s Lament, 28mm
This week we were in central Scotland, fighting a skirmish set in the Marian Civil War (1568-73). I’ve been painting up my figures for this period, and reckon I have enough for both sides. In this game, taken from Scenario C in the rule book, the newly-formed royal army was mustering at Rutherglen, now part of modern-day Glasgow. The Queen’s pay chest, along with much-needed powder and shot was on its way from Edinburgh, guarded by a powerful royalist escort led by the Earl of Rothes. When word of it reached the rebels, they sent their own force to capture it, under the command of the Earl of Morton.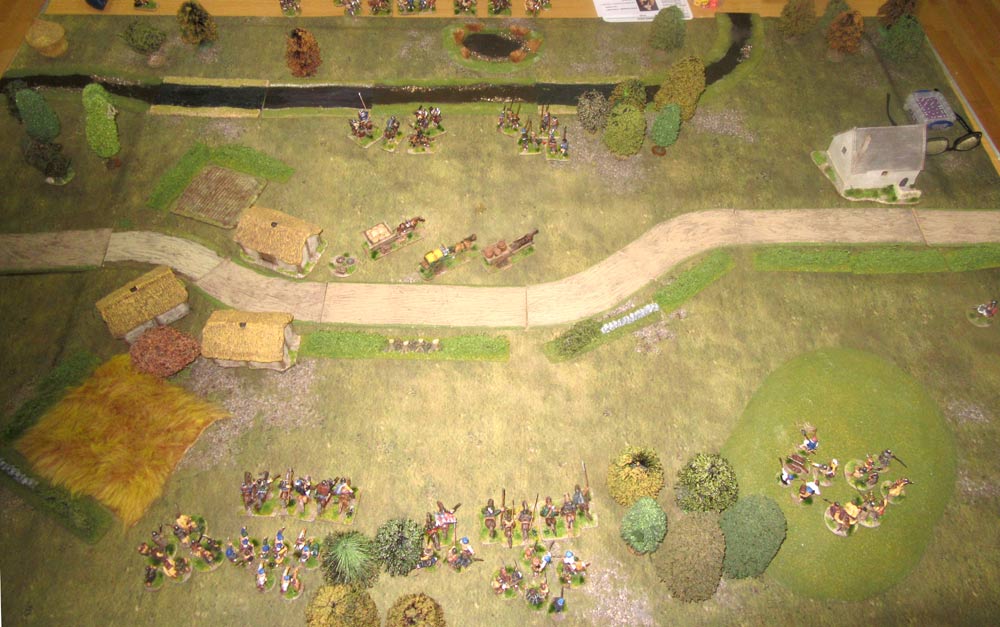 A ruse led to the Earl of Rothes sending part of his force off to chase rebel scouts, which left the wagon train with just a weak escort. Worse, it had halted just outside Cameon, on the outskirts of Falkirk, and as Rothes launched his attack the escorts were watering their horses at a nearby river. In our The Pikeman’s Lament game, this translated into a small 8 point escort beside the stream, just to the north of the wagons which had been pulled off the road. The rebels attacked from the south. Then, from Turn 2 on, the rest of the Earl of Rothes’ men would appear from the east and the west, along the Camelon road. We played the game out on a 6×4 foot table.
 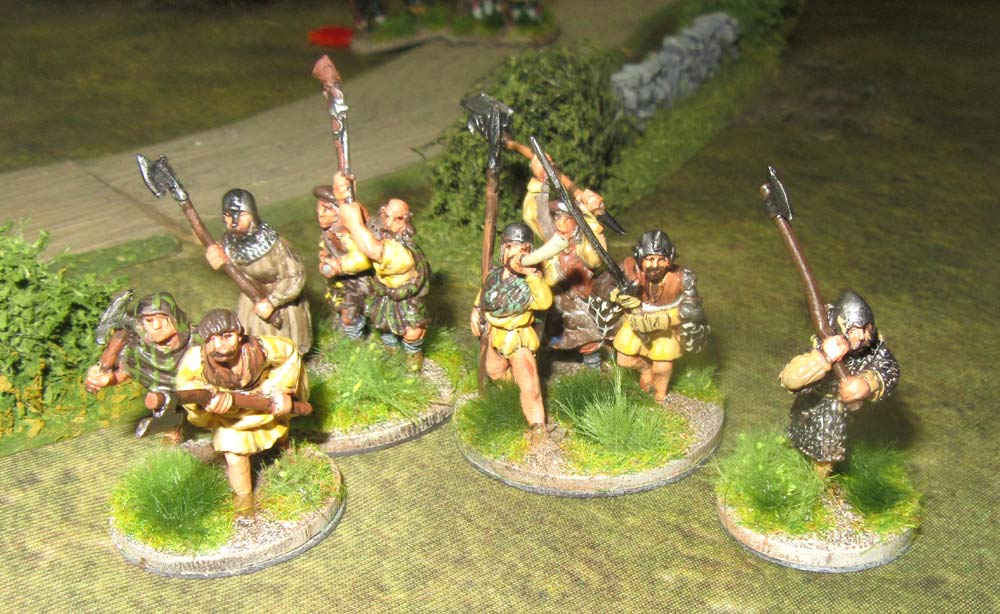 The attackers headed for the road en masse, although on the left and right the rebels were watching out for the Queen’s men returning along the road. The force included two groups of highlanders, archers and arquebusiers, border horse and even a small field gun. The Earl of Moray himself was accompanied by his own small group of dismounted retainers. The border horsemen led the way, and thanks to some lousy activation rolls by the Earl of Rothes (played by Sean), they beat the escorts in their race towards the wagons. Soon the first the three wagons – the game’s main objective – was under new ownership.
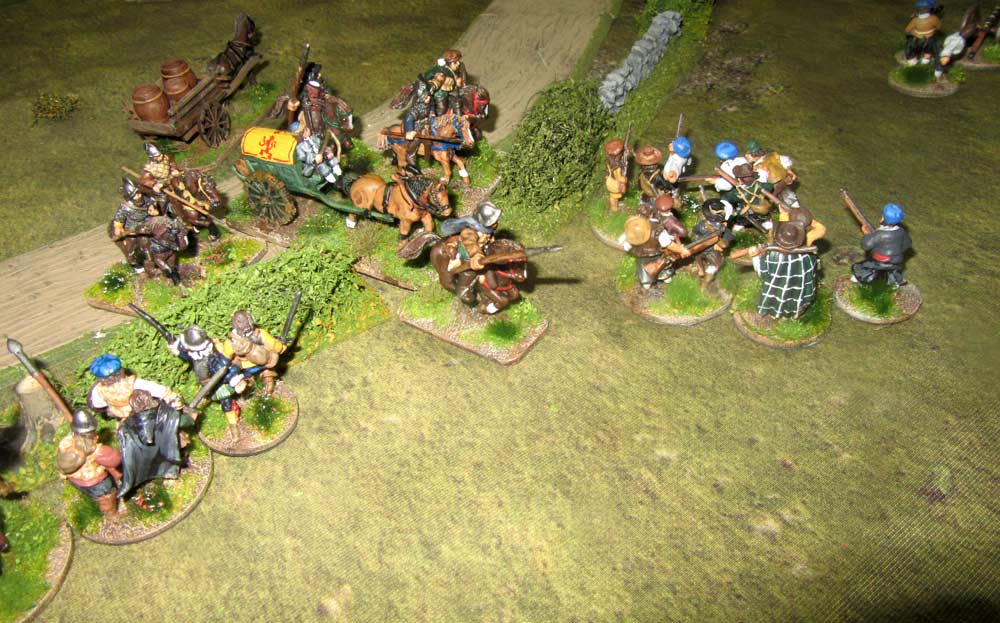 The stripped-down royalist escort of the wagon train consisted of a unit of 6 border horsemen and 12 figure pike block. They moved up to stop the attackers making off with the remaining two wagons, but the first one had already been spirited away by 6 rebel border horsemen. They had steered it through a gap in the roadside hedge, and were now trundling towards the southern table edge.
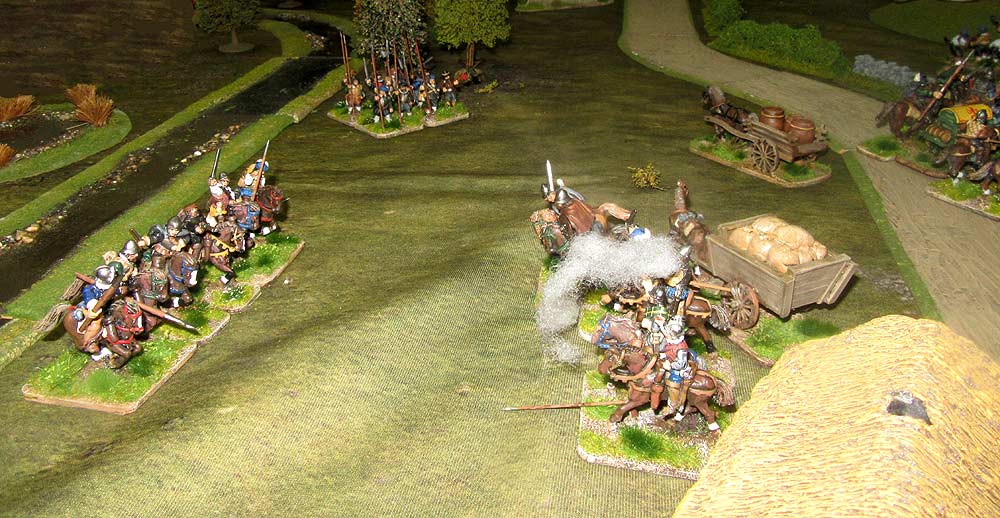 The royalist border horse pinned down the second rebel border horse unit, while the pikemen advanced steadily towards the rebel shot unit clustered around the second wagon. Before they reached it, they came under fire from the two rebel shot units – one of arquebusiers, the other of archers. The pikemen started falling, but they kept coming on. Then, just as they were about to fall on the arquebusiers, the second wagon was spirited away. Another volley of arrows and the pikemen started to fall back.
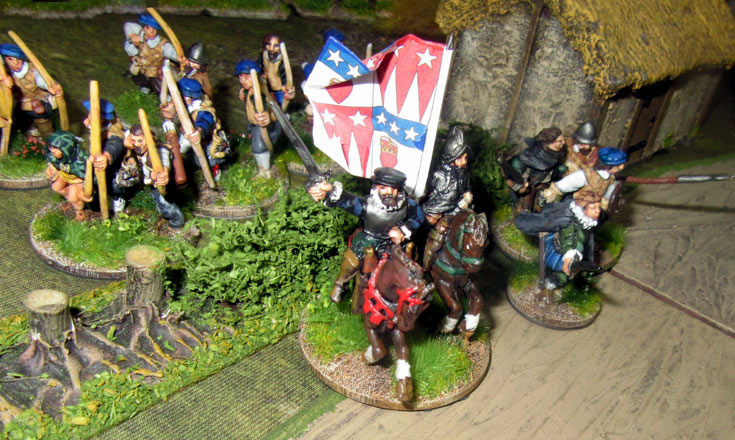
 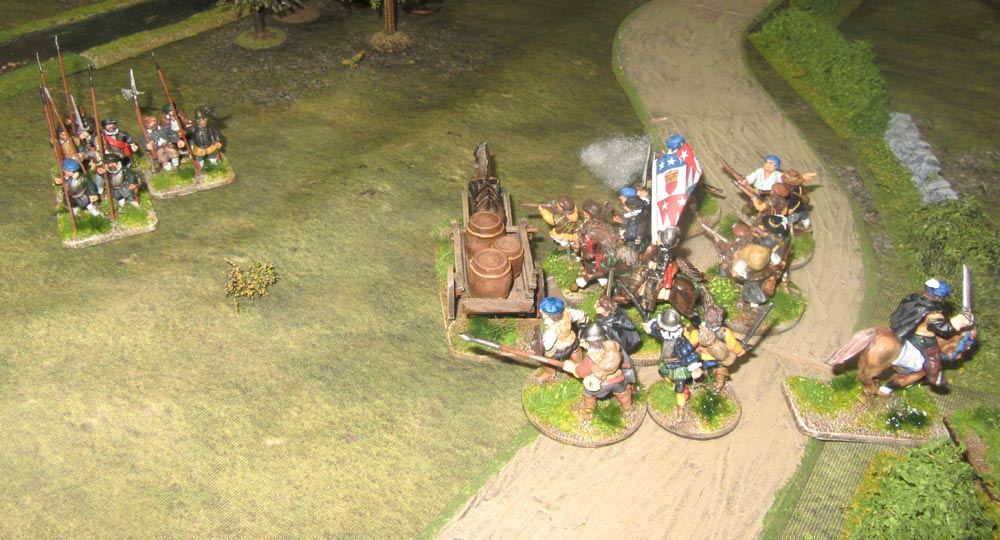 By then though, the royalist reinforcements had arrived. Lord Paisley (played by Mally) arrived from the eastern table edge, with a growing body of troops. The Earl of Rothes himself appeared from the west, with his own escort of mounted retainers (below), a unit of pikemen and some more border horse. It would now be a race to get the stolen wagons off the table before the royalists arrived.
 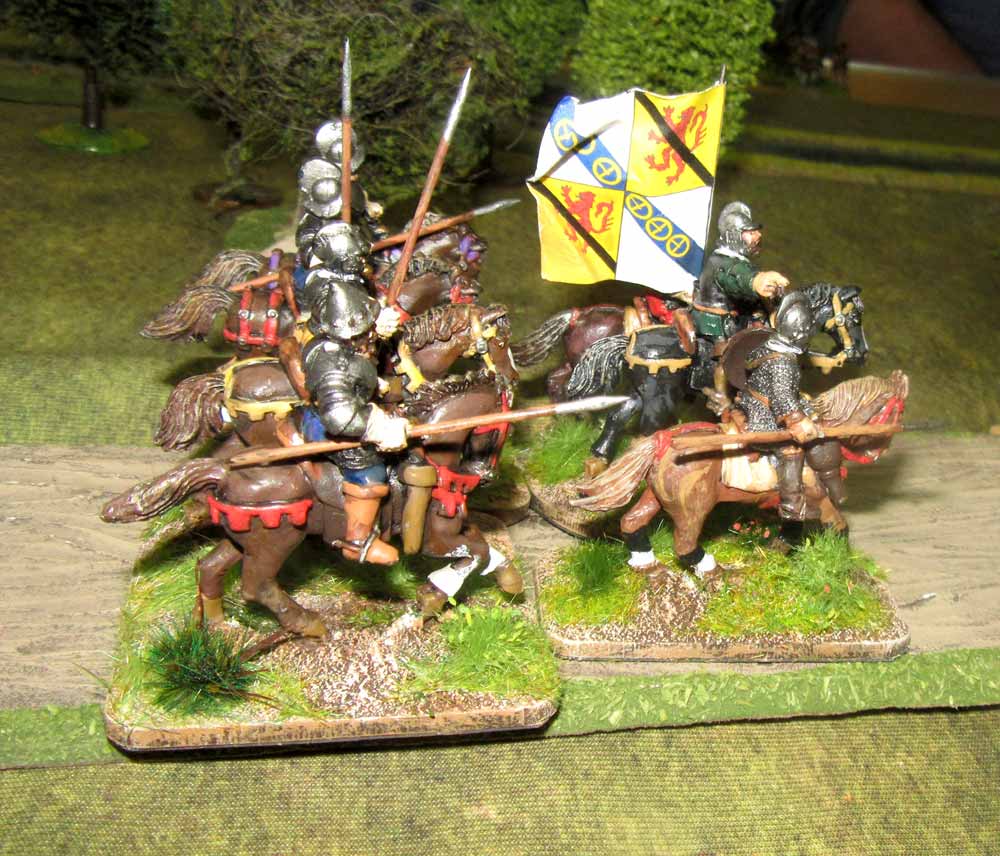 As there were just three of us playing, I didn’t have the luxury of a co-commander. So, I also played my subordinate commander, Sir William Kirkaldy of Grange, who was on my right, at the head of a unit of highlanders. They fell back when Mally’s cavalry approached, and then when the horsemen halted they went over to the attack. The highlanders were repulsed, but the horsemen were badly beaten up, and both sides withdrew. Then, the rebel gun opened up, and peppered the royalist border horse. That forced them to withdraw taking poor Claude, Lord Paisley with them. So, for the moment the threat on the rebel right flank was dealt with.
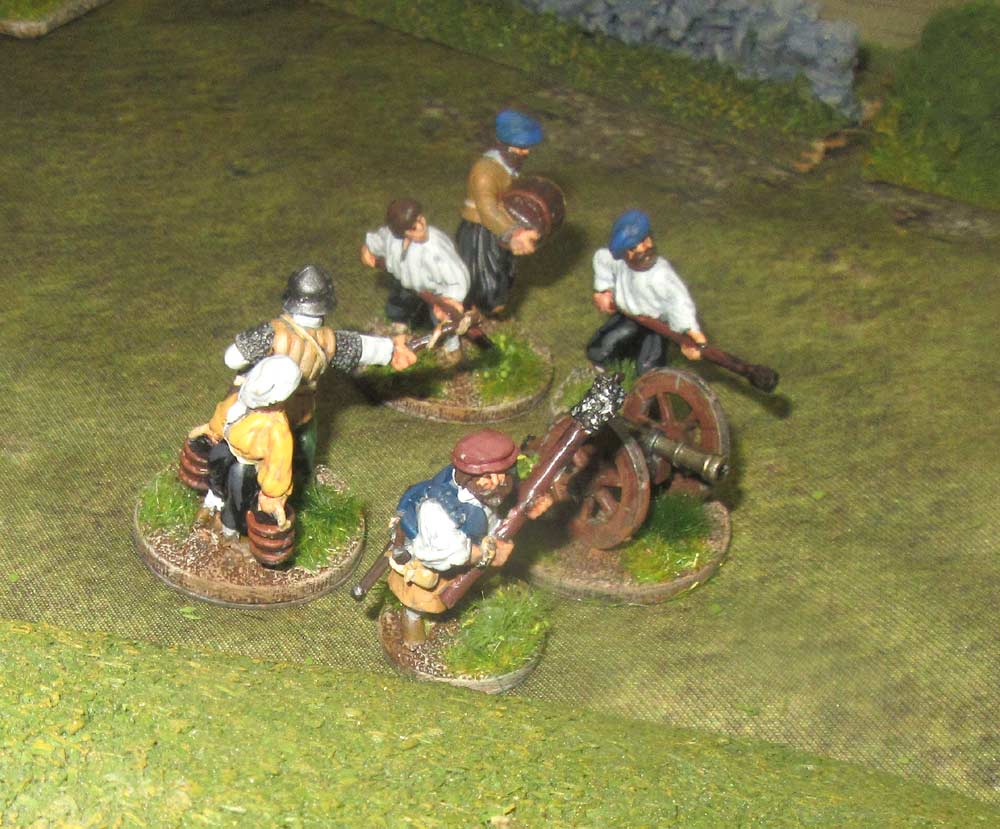 In the centre the third wagon was seized, and made its way off towards the southern table edge, escorted by a unit of rebel musketeers. The trouble was, the royalists were now closing in. Each wagon that left the table stripped the rebels of one of its units, as it had to escort the plunder. So, it was all about timing – “collapsing the defensive box” of you prefer – and more importantly holding off the royalist attacks until all three wagons could be led off the southern table edge.
 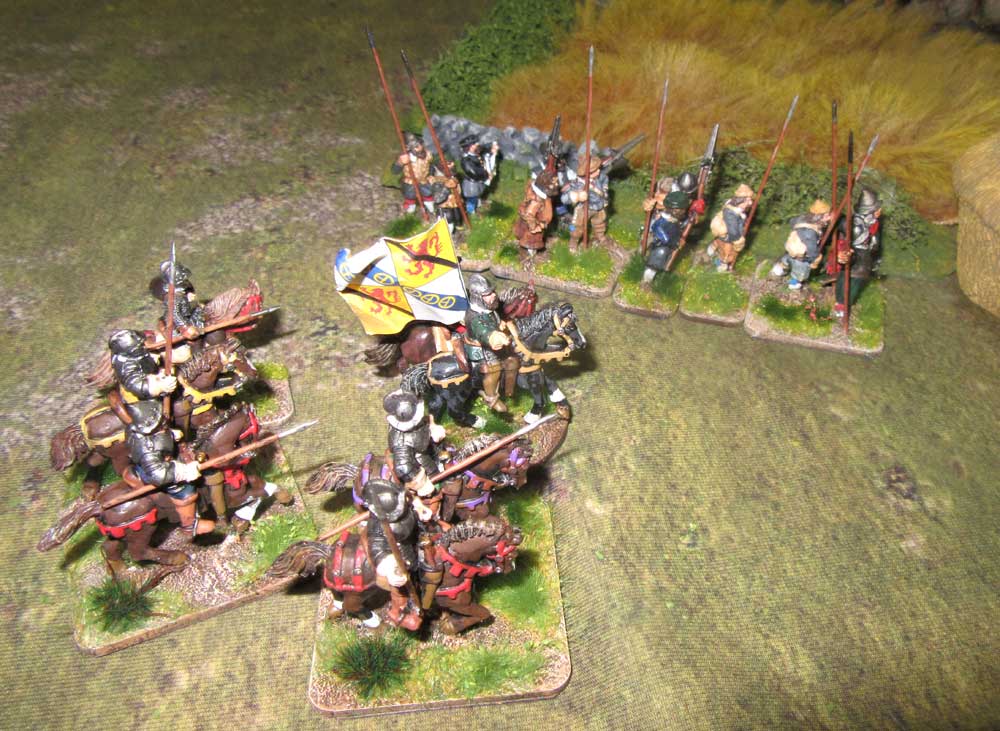 So far the rebels had been pretty lucky, having chopped up three enemy units, including all of the initial escort, and Lord Paisley’s own bodyguard of border reivers. Now though, as the wagon exited the table, things were looking a lot less rosy. On the right, Lord Paisley had sorted himself out, and was returning to the attack. Leading the way was his own unit of mounted retainers – 6 powerful demi-lancers. Once again though, they were caught on the hop by Kirkaldy’s highlanders. When the cavalry charged but didn’t reach them, the highlanders obligingly went over onto the attack. In the melee that followed both sides were battered and pulled back.
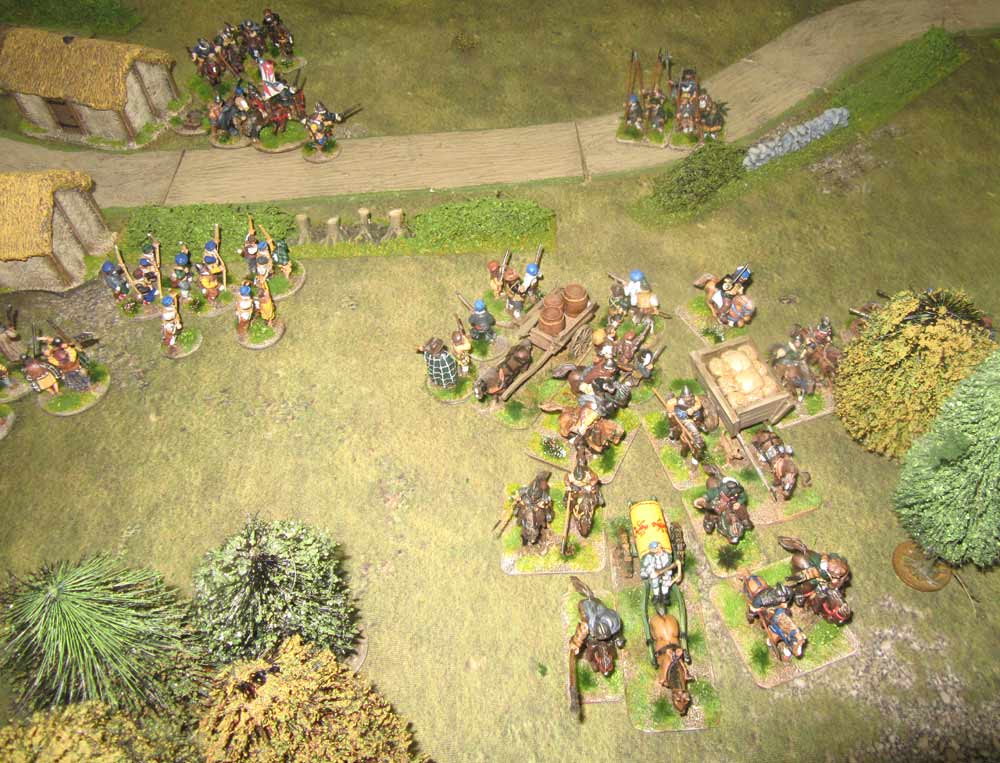 This though, eased the pressure again on the rebel right flank. The danger now would come from the left – the western side of the table. Sure enough, Sean’s own mounted retainers swept in and charged another unit of highlanders, who were badly chopped up and sent running. They then followed up by attacking the nearest wagon, and drove off the arquebusiers escorting it. The cavalry were then driven off by fire from the arquebusiers and archers, but at least they’d successfully recaptured one of the three wagon!
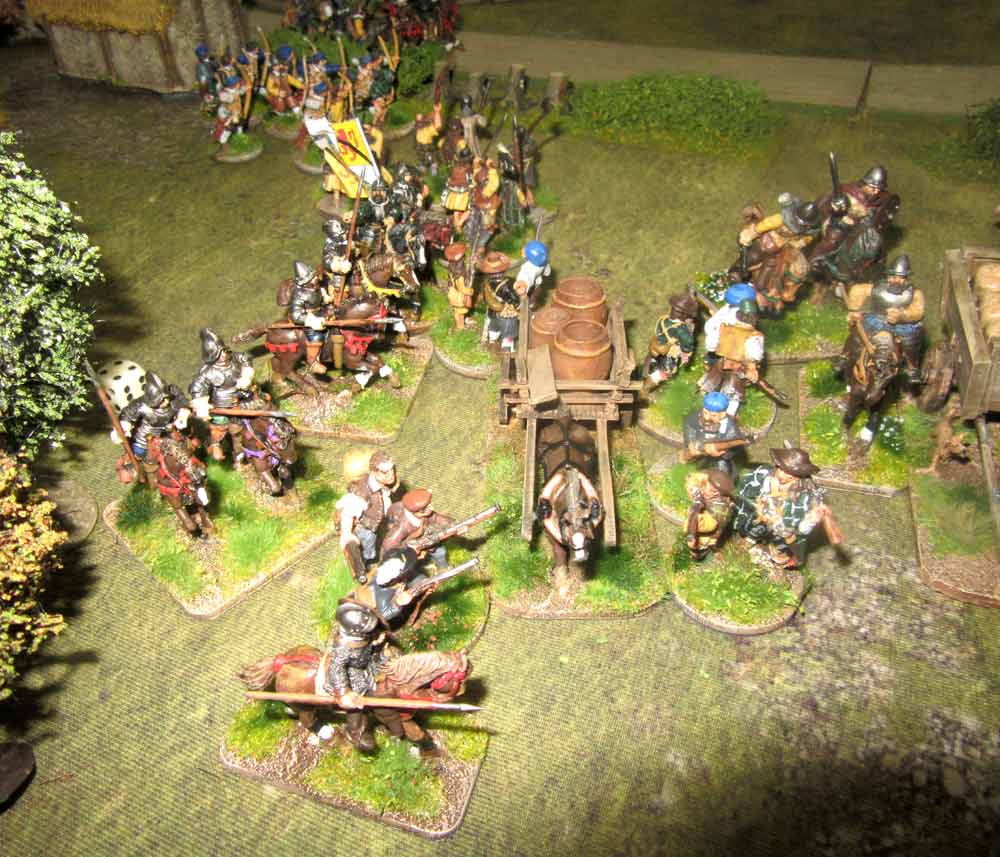 That pretty much marked the end of the game. All that happened after that was that the remaining unit of royalist pikemen tried to take on the rebel archers, but were stopped by arrow fire, and the second of the three captured wagons made it safely off the table. So, we called it a day. In terms of victory conditions the attackers get two “honour points” for each wagon they absconded with – which meant four points for the rebels. the Earl of Moray also gained another “honour point” for his special order (not attacking anyone), and the Earl of Rothes lost one thanks to a “Double 1” activation roll, and the resulting roll for its effect. So, the skirmish ended in a clear rebel win – and a mightily “hacked off” Royalist army up the road in Rutherglen, waiting in vain for its pay!
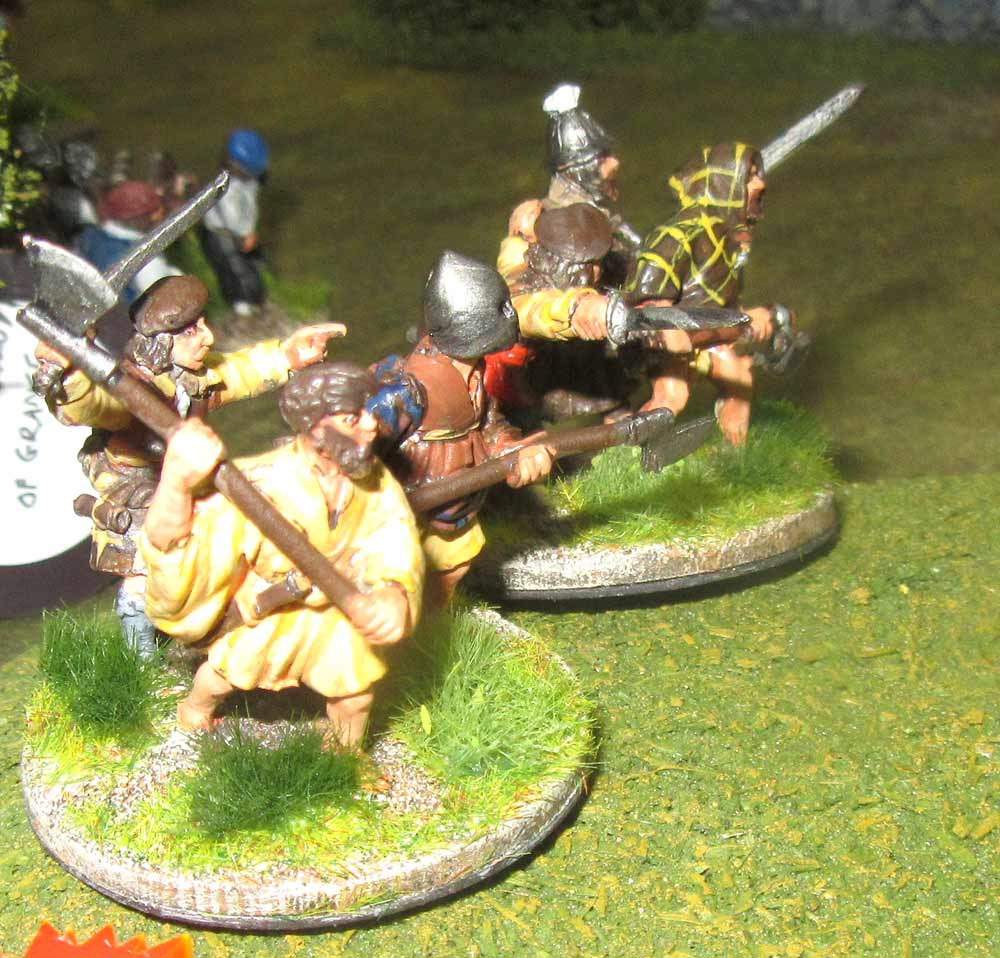
Thanks for these excellent battle reports and the information on the Mary QoS Wars. I’m the owner of the Vendel (now Thistle & Rose ) Elizabethan/Border Reiver figures and our figures are a perfect fit for the Mary Wars. We are also starting to game the larger Ren period and focusing on the Nine Years War in Ireland and the 80 Years War to cover larger skirmish themes behind cattle raiding. We will add the Marian Wars to the list. Would you have any books you. Could recommend on the Marian Wars?
William, I started off getting Vendel figures, to play Border Reivers, then it all morphed into this. As for reading, there isn’t much – Harry Potter’s book on the Siege of Edinburgh, Grampian Battlefields, or passing references in the numerous books about Mary. Oh, and there’s the Foundry book on 16th century armies, which has some useful stuff, as does the Osprey Elite title on Scottish Renaissance Armies. Its actually crying out for a good book on the wars…
Hi Angus,
Tried emailing you a few times and keeps getting bounced.
Drop me a line – via email or the widget thingy on my blog !
Hi Stuart. I can’t see why there’s a problem.
I’ve pinged you an e-mail though.