
Action at Sandspruit Halt, 1900
5th October 2017, 3 Comments
Queen Victoria’s Little Wars, The Men Who Would Be Kings, 28mm
I never planned to wargame the Boer War. Sure, I found it interesting enough, but I always thought the thing pretty dull to wargame, especially the big battles. My mistake, of course, was to buy a “sample pack” of Old Glory Boers recently. Then, I bought some more, this time from Foundry. The thing is, I already have a British army for this time period for the North-West Frontier, so I sort of had one side already, even if I left out my Sikhs and Gurkhas. So, when Bill Gilchrist and I were planning a game, I gave him the option of two Victorian campaigns. When he chose the Boer one I had to speed-paint 36 Boers in a week (fairly easy), along with 24 unpainted British infantry I had, plus a Maxim gun and a field gun team. So, here were are, at these new troops’ first outing in the Transvaal.  In the end, Bill couldn’t make it, and he had a poorly cat to deal with, so my opponent for the evening was Peter. We were also joined by Derek, who was gameless, even though he had to leave early. After tossing a coin, Peter took charge of the Waakzaamheid Commando (named after a ship in a Patrick O’Brian novel), which consisted of three units of Boers (classed as irregular mounted infantry, with modern rifles). Derek took two units of the Dorset Regiment, and I commanded a unit of the Argylls, plus a field gun – a 15pdr. RBL for those who care).
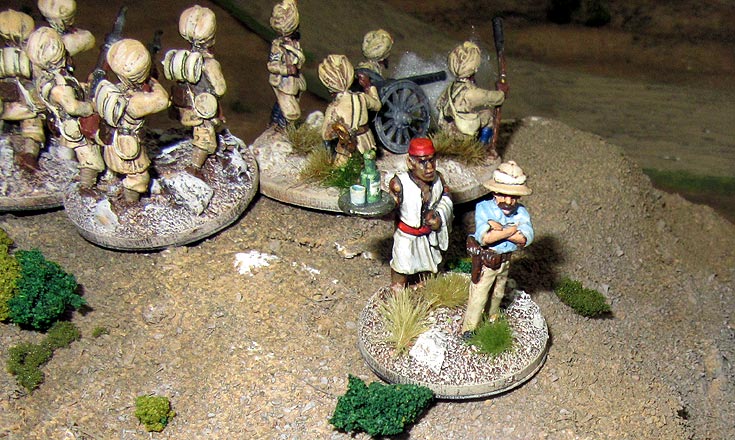
 This model, by the way, was a Foundry one, and a real bugger to put together, but it was worth it, as it looked the part. Besides, my only other gun for this period was a Sikh mountain gun, which wasn’t really appropriate for South Africa. The game was played on a 6×4 foot table. Apart from the gun, all of the units were 12 figures strong. So, this was very much a skirmish game. There’s no figure scale in The Men Who Would Be Kings, but we thought of each unit as a company, and that probably wasn’t too far off the mark. The scenario was an attack one – the British had to capture Sandspruit Halt (little more than a shed and a railway crossing in the middle of nowhere) by the end of the game.
  The thing about these rules is that you have to pass a Leadership test to do anything, like move, or sometimes to fire. Each unit had its own leader, and while Peter’s included “a fine upstanding burgher” and a “hero of the Transvaal”, our motley lot included two “idiots” and a “timid chap”. Not good. So, our units led by idiots had to pass a test to fire – something that should come free to British regulars. As one of the idiots commanded the field gun, we spent the first few turns not shooting at anyone. After some debate on what to do, Derek decided to advance on his side of the road that ran up the centre of the table. I think my advice of ; “Well, you could stay put and wait for the gun, but where’s the fun in that?” tipped him over the edge into rashness.
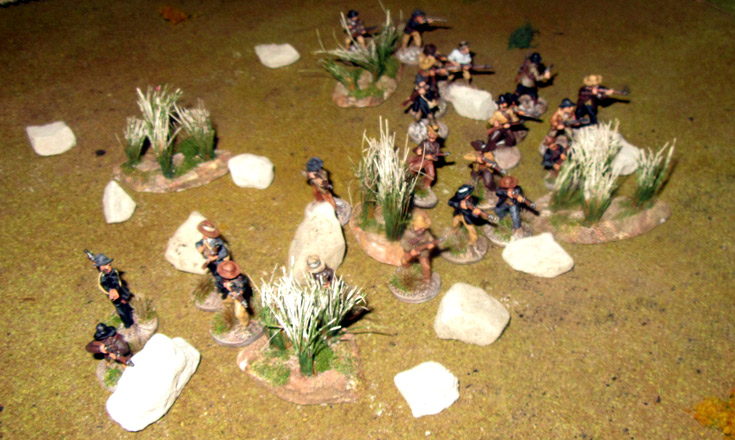
  So, on my left the Dorsets advanced, while the Argylls waited for the gunners to finally get their act together. When that happened the fire prove wonderfully effective. i was shooting at the unit of Boers lurking in the rough ground in front of the shed, on my side of the road. Within three turns Peter had taken half a dozen casualties, and pulled them back out of range. The Dorsets though, weren’t so lucky.
  On their side of the table they came under fire from two Boer units, and started taking casualties – lots of them. One unit was pinned, and to unpin the leader needs to pass a leadership test. needless to say they didn’t, and half of the Dorsets were cut to pieces. The other unit was mauled, but finally managed to get back out of range. So much for the Dorsets. Fortunately the Argylls, who had been sitting smoking and watching the fun, finally got the order to advance.
 They had an easy time of it. The Boers to their front were hidden behind the shed, while the others on Derek’s side of the table were out of range, and unwilling to break cover. They were now being shelled by the field gun, and so after taking more casualties Peter pulled them back too. In a rather gentlemanly fashion, he allowed Derek to put together one reasonably effective unit from the remnants of his two units, and it began advancing up the table. So too did the field gun, to get the Boers back into range.
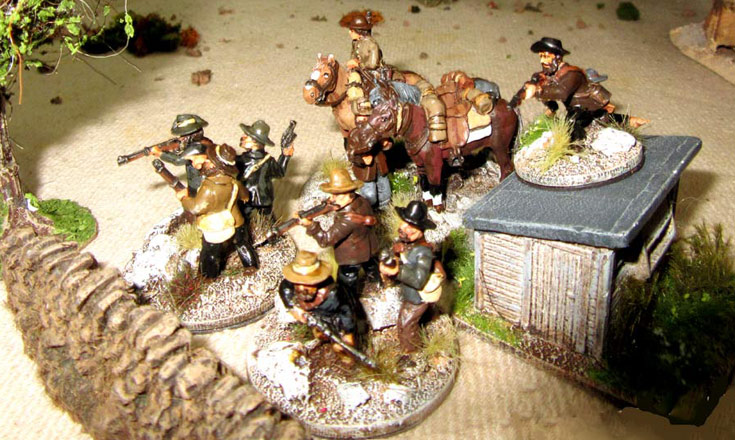
  By this time the Argylls had reached the rock-covered low hill on their right flank, and just in time too, as a unit of Boers were riding up its far slope. The Highlanders got there first though, and shot the Boers from their saddles. The handful of survivors retreated, and the Argylls were able to jump forward the next leg to the shed. By now the gun was up in range, supported by the combined Dorset unit. A sneaky Boer flank attack almost did for it, through long range fire, but Peter’s die rolling let him down, and the gun was manhandled back out of range.
  By now the game was effectively over. All that was left was for the Highlanders to launch a bayonet charge on first one, and then the other Boer remnants, and the day was ours. By the time the Argylls seized Sandspruit Halt there was only one small Boer unit left on the table, and it was under fire from the Dorsets and the gun. So, the game ended in a clear British victory, although thanks to Derek’s “rashness” the cost had been high. Next time though, I’ll have to give the Boers some artillery of their own, to put into the force pool, and some horse-holders wouldn’t go amiss too. Dear me – I’m already racking up the cost of what was never going to be a period of mine! So much for a “sample pack”…
Interesting, what is your opinion of those rules? I recently bought them and was thinking of using them for a new project of mine – King Philips War in New England. However I’m wondering if I should instead use Pikeman’s Lament, although I guess it’s the same basic system.
Anyhow, how did you gents think they worked?
Joe, The system works well, and is very straightforward and simple.As Pikemen’s Lament and The Men who would be Kings share the same basic system, then either would do, although the 17th century set might need less chrome and tweaking to suit your period. Three are minor differences though. For one, in TMWWBK each unit has its own keader, with characteristics, while in PL the only leader is a force commander. Just as a suggestion though, might’ve you be better off using Muskets &? Tomahawks?
Great looking game love the addition of the railway track as many of the Second Anglo Boer War revolved around rail tracks. I I think the Boer Wars provide a number of fantastic wargame opportunities and look forward to seeing you getting yet more minis and playing this aspect of colonial warfare . Skirmish games for Boer War could include trains – a game revolving the capture of Churchill for instance. The later part of the conflict is also ideal for skirmishing – Boers trying to get past a blockhouse or Boers trying to prevent Brits from rounding up civilians from a farmstead to be taken to a concentration camp. the scenario possibilities are varied and numerous. Indeed, I am surprised that not more colonial wargaming focuses on the Boers. Boers are available in 20mm and 15mm too making for cheaper games.