
The Battle of Babruysk, 1708
10th June 2016, 0 Comments
Misc., The Great Northern War, Homemade Rules, 28mm
This weekend I was down in Warwick, with the guys from the Military Gentleman forum. Officially the whole weekend was about playing games set in the Seven Years War, but the first of them I played was actually based in an earlier conflict – the Great Northern War. Now, I’m a bit of a fan of the conflict, as my first ever Osprey book was about Peter the Great’s army. Many years ago I even had a small Russian army of the period, in 15mm. So, it was little wonder I jumped at the chance to play this game, run by Paul Robinson of the Grimsby club, who concentrates on this historical period – well, this and the War of the Spanish Succession.  So, this game was set somewhere in Russia, and centred around a bridge over the River Berezina and a small village straddling both banks. From there the road from the bridge ran westwards for half a mile or so to the nearby town of Babruysk, which was just off the table. In our game a small Russian force was deployed on the western bank, in front of the bridge, while the rest of the Russian army was on the eastern bank, but just off the table. The idea was to buy time to prepare the bridge for demolition, before the Swedes could capture it. So, the scene was set for what proved a game that was as colourful as it was enjoyable.
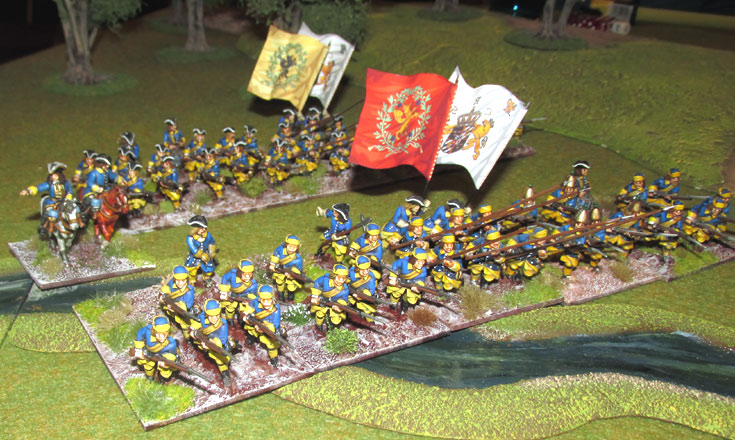
 The Russians had slightly more troops – 14 battalions of foot and two regiments of horse, plus a couple of guns, while the Swedes had 9 battalions, three cavalry regiments and a few guns. They though, were generally of better quality of the Russians, and their army included elite Drabant cavalry, and a battalion of Swedish foot guards. As befitted the period, all the infantry on both sides had pikemen as well as musketeers – a ratio of about one to four of pike to shot.
  The battle began with the Swedes marching onto the table with one force appearing on the Babruysk road, in front of the village, and the rest – the bulk of the Swedish army – appearing on the southern and south-western table edges, where it clearly hoped to roll up the Russian defenders before they could call on reinforcements from the far side of the Berezina. For my part I began shuffling reinforcements over the bridge, but of course there was a limit to just how fast this could be done, and it soon became clear that the outnumbered Russians on the eastern bank had to hang on for as long as they possibly could. Given the number of Swedes heading my way that didn’t look like it was going to be too easy!
 Actually, I’d strung out my defenders too thinly, to hold as large a bridgehead as I could, and it was clear this was playing into the Swedes’ hands. what saved me from an early humiliation was my die rolling. First, a battalion lodged in the village was attacked by the Swedish advance guard, and held on for three turns before it was routed. Also, the Swedes seemed more dilatory than I’d expected, particularly on their right flank. That bought time for the first of my reinforcements to enter the fray.
  The arrival of these fresh Russian troops made me a little rash. I sent one brigade off to my right – a sector of the battlefield that wasn’t threatened – with orders to launch an attack on the thinly-held Swedish left flank. The idea was that it would throw the Swedes off balance. Meanwhile,my left as centre as looking increasingly under threat. I formed a firing line, and my volleys kept the Swedes bay for re moment. However, they were better troops, and they were massing for an about attack. When it came the following turn my troops began to buckle under the strain. The assault was concentrated on my left, where the Swedes enjoyed local superiority, but to make sure I couldn’t reinforce my flank the Swedish players launched a joint cavalry and infantry assault against my centre.
 I was outnumbered in cavalry, but my two units counter-charged, first the line dragoons and then the horse grenadiers. While the dragoons were quickly routed, the grenadiers were made of sterner stuff, and at first they threw the Swedes back. However, they soon returned to the fray, and this time the Drabants joined in. My gallant horse grenadiers fell apart, leaving a nasty big hole in my line. the infantry on my left flank were now doing the same – bucking under the pressure of the Swedish assault. The only bright spot was that around the village my line was holding firm. I also had that small brigade on my right, which while it didn’t achieve anything else, at least it stopped the enemy from assaulting me from that direction as well.
  Right, so you get the picture. the Swedes were pushing forward, my bridgehead was contracting, and it looked like one more good Swedish push would see them cut their way through to the Beretzina bridge. Strangely though, that proved to be the Swedish high water mark. By now their leading units had taken quite a few casualties, and while my front line troops were dead, dying or routed, the Russian reinforcements who had marched over the bridge were still fresh. they stemmed the tide, with the help of the Russian artillery. rather, they held the Swedes off until lunchtime, which was when we fended the game. However, if the game had gone on another couple of turns I reckon they’d have chopped my reserve to pieces. Looking at the general situation, and the body count, this looked pretty much like a Swedish win. Still, it was a great game, Paul’s homegrown rules worked splendidly, and it looked terrific.